Return To Node
Return To Node jumps traversal to a different point in the Graph instead of following a normal outgoing pin - useful when your branching structure would otherwise need a pin connection that crosses half the canvas, or loops back to a node that already has other parents. This page covers how the jump actually works, and a real fragility worth knowing about before you rely on it heavily.
1. What Return To Node Is
UMounteaDialogueGraphNode_ReturnToNode derives directly from UMounteaDialogueGraphNode (not DialogueNodeBase) - it carries no dialogue text of its own, only jump configuration.
Does Auto Startistrue. It fires the moment traversal reaches it - no player input needed to trigger the jump.- Has no output pin. Like Complete Node, Return To Node is configured with no outgoing connections in the graph editor. It doesn't reach its target through an edge at all - see below.
- Does not inherit Graph Decorators (
bInheritGraphDecoratorsdefaults tofalsehere, unlike most other node types) - only its own Node Decorators run.
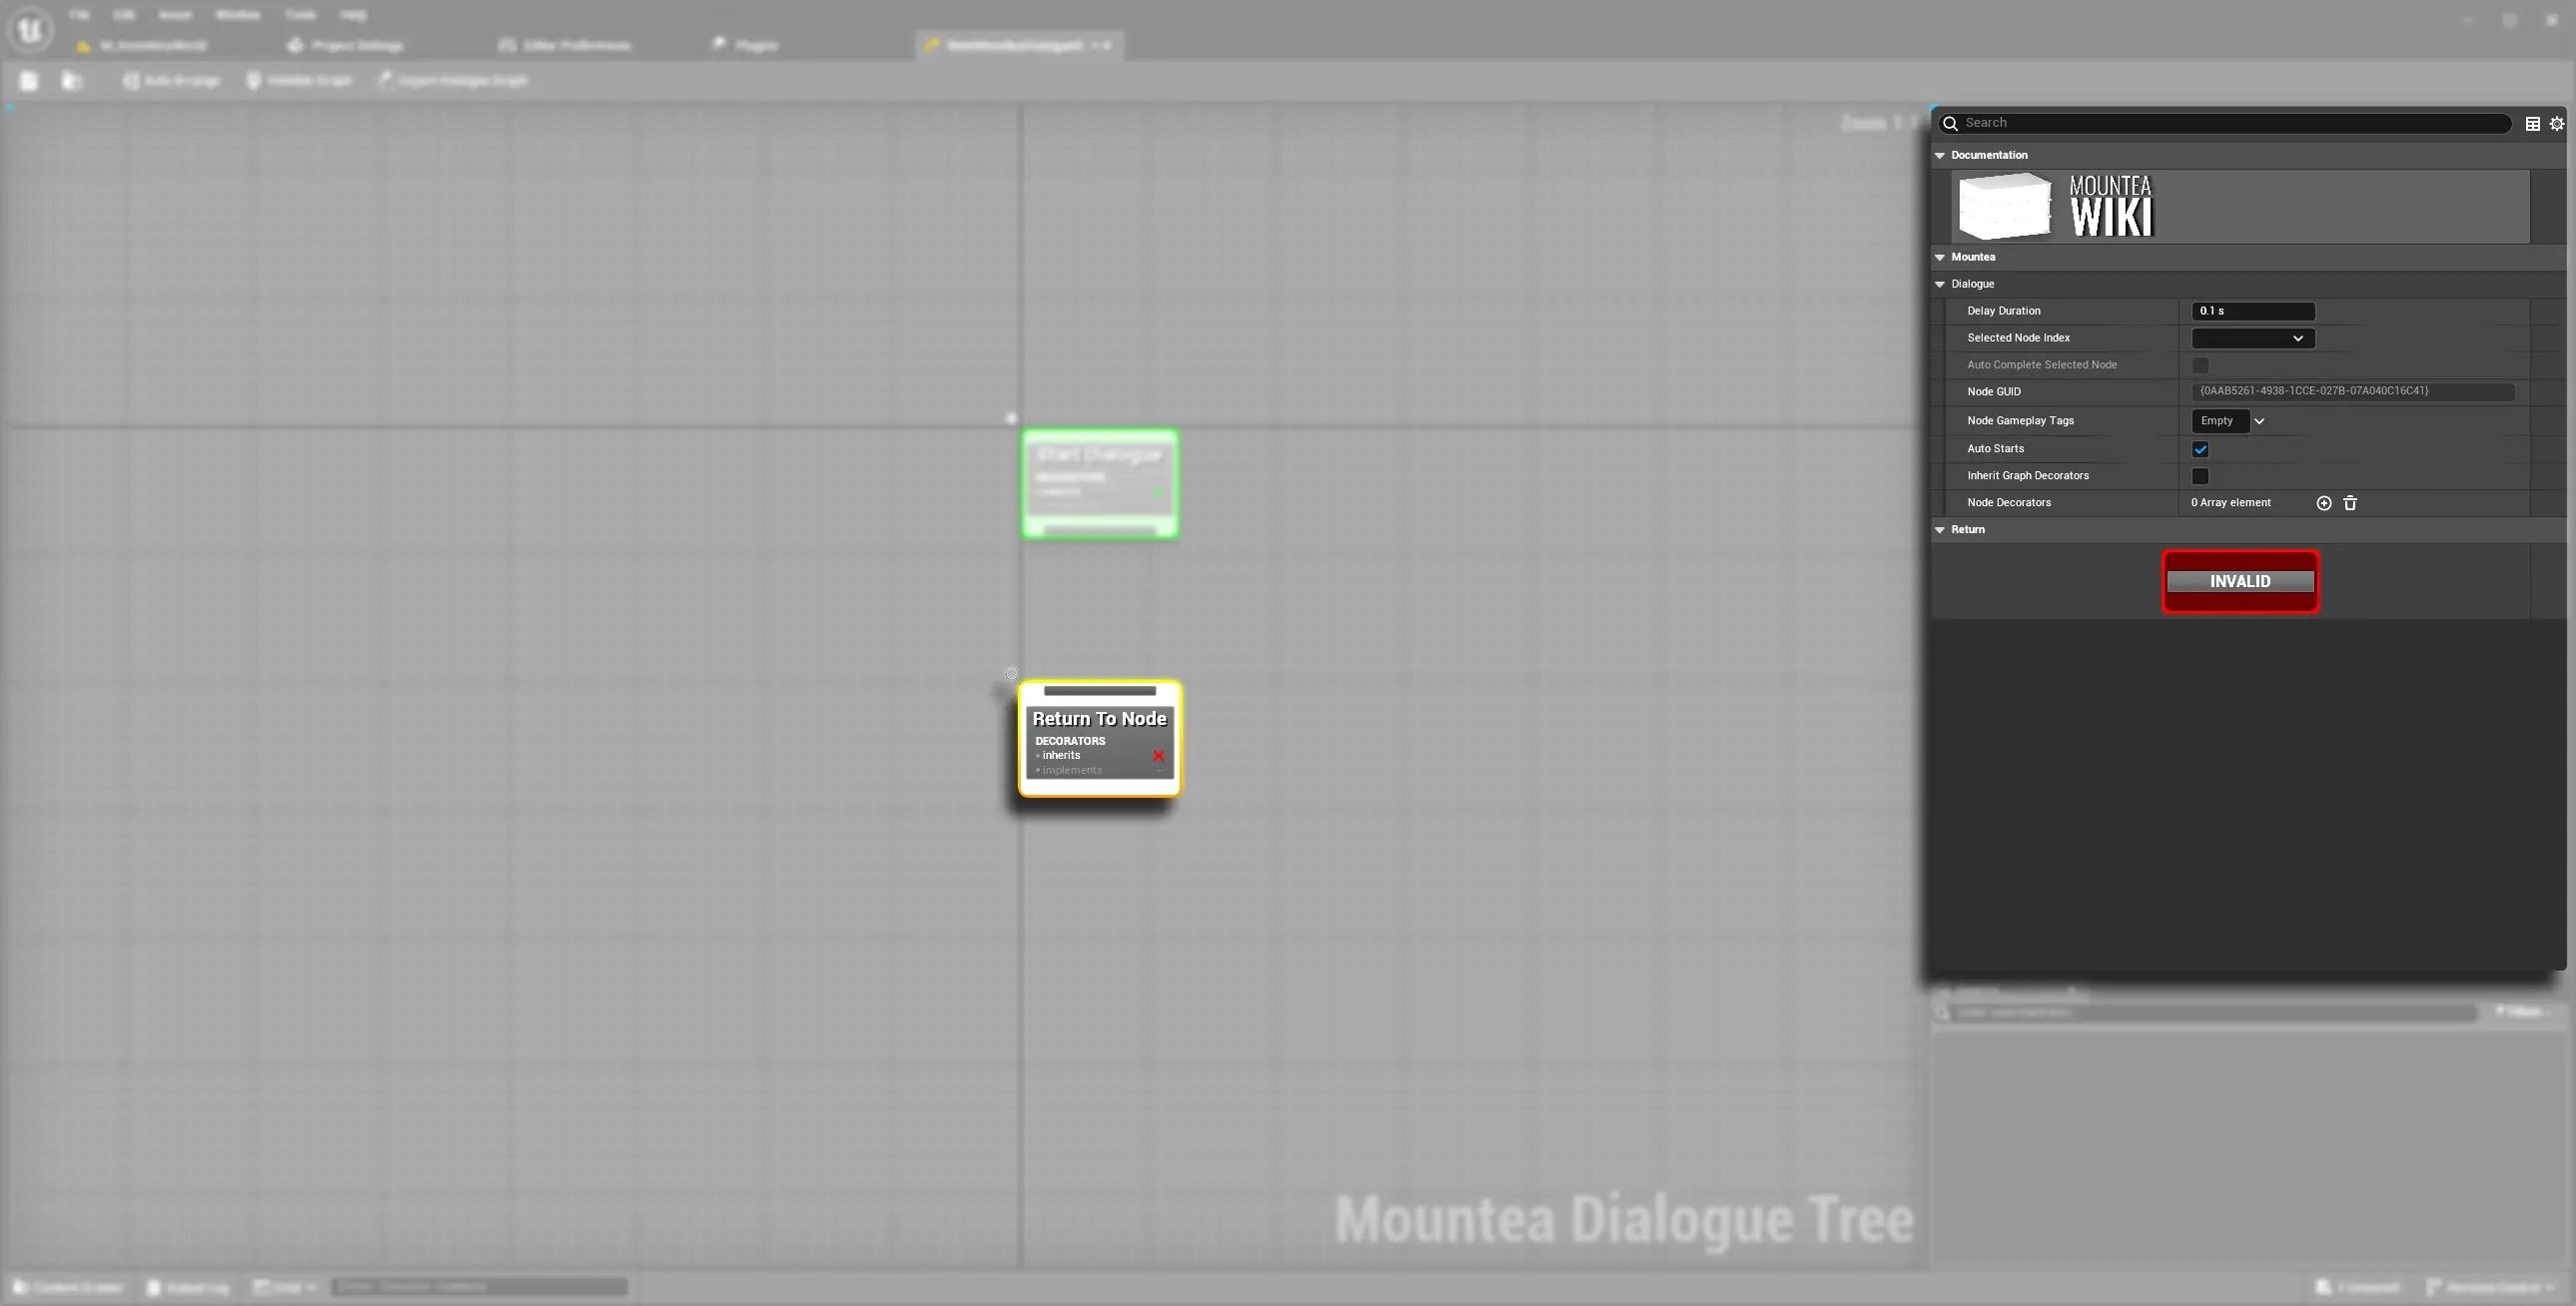
2. How the Jump Works
Return To Node's ProcessNode starts a timer for Delay Duration (seconds) before calling the base decorator-execution logic - so the timer is already running by the time Super::ProcessNode runs the node's own Decorators. A short delay exists on purpose: jumping instantly can cut off audio that's still playing, or leave client-side actions no time to complete.
When the timer expires, one of two things happens:
- If
Auto Complete Selected Nodeis enabled, the node writes its target (Selected Node) directly into the active Dialogue Context, bypassing edges and Edge Conditions entirely, then immediately marks itself processed. - If disabled, it calls the Manager's
Select Nodewith the target's GUID instead - going through the normal node-selection path.
Info
Both paths land on the same target node - the difference is whether the jump goes through the Manager's normal selection flow (so Edge Conditions and the rest of the traversal machinery still apply on the way there) or writes the context directly and skips that machinery. If your jump target needs to respect an Edge Condition, leave Auto Complete Selected Node off.
3. Picking a Target
The target node is picked from a dropdown of node names, filtered by Allowed Nodes Filter - by default this excludes Return To Node, Complete Node, Delay Node, and Start Node, so you can only pick a node you could plausibly return dialogue to (Lead or Answer nodes, mainly).
SelectedNodeIndex Fragility
Under the hood, the picked target isn't stored as a GUID like everything else in this system - it's stored as Selected Node Index, a plain string parsed into an integer offset into the Graph's flat node list (Graph->AllNodes). Every other traversal lookup in the plugin uses stable GUIDs; this one doesn't.
In practice this means reordering nodes in the Graph can silently repoint a Return To Node at the wrong target, with no validation error to catch it - the index still resolves to a node, just not the one you originally picked. If you're building a large tree with several Return To Nodes, re-check each one's target after any bulk reorder, paste, or auto-arrange pass, rather than assuming it stayed put.
4. Setting Up a Return To Node
- Add a Return To Node as a child of whatever node should trigger the jump.
- Set Delay Duration - a short value (a fraction of a second) is usually enough to avoid cutting audio.
- Pick the jump target from the Selected Node Index dropdown.
- Decide whether Auto Complete Selected Node should be on (direct context write, skips Edge Conditions) or off (goes through normal
Select Node, Edge Conditions still apply).
#include "Nodes/MounteaDialogueGraphNode_ReturnToNode.h"

// Blueprintable - the properties above are all BlueprintReadOnly
// and editable in the Details panel; ProcessNode already implements
// the jump, so most subclasses won't need to override it.