Start Dialogue
Learn how to invoke the Mountea Dialogue System to kick‑off a conversation at runtime, including setup requirements, API calls, and common pitfalls.
1. Prerequisites
Before starting a dialogue, ensure your project and level are configured with the foundational Unreal classes and Mountea components:
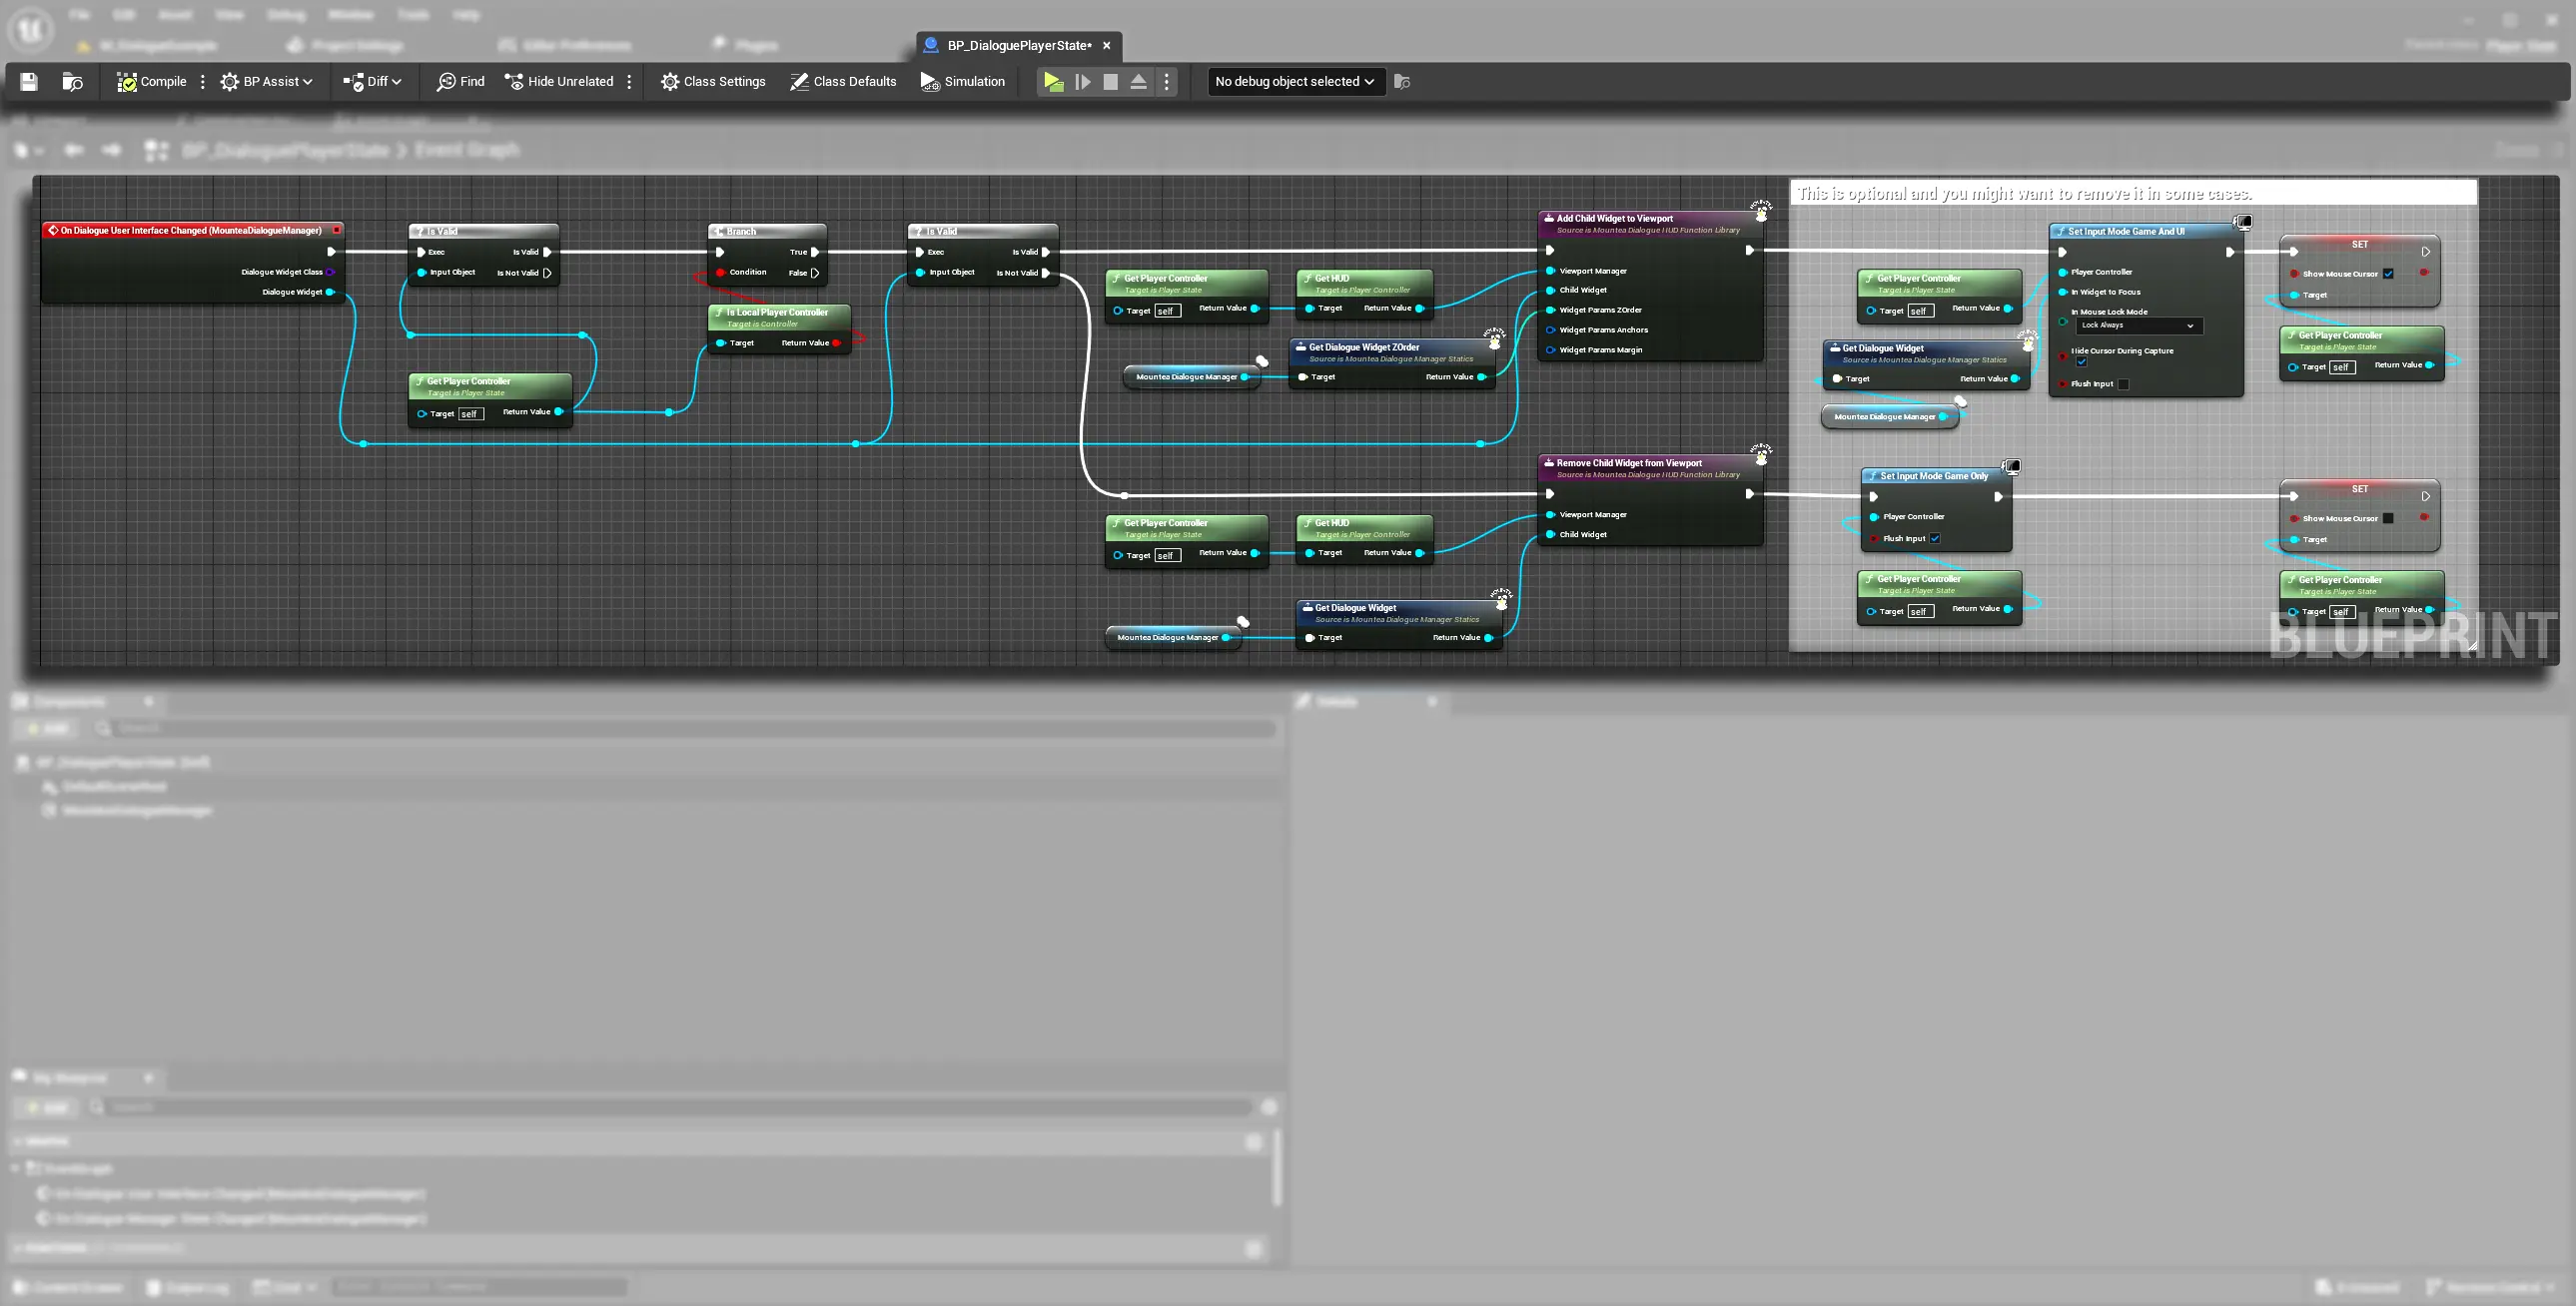
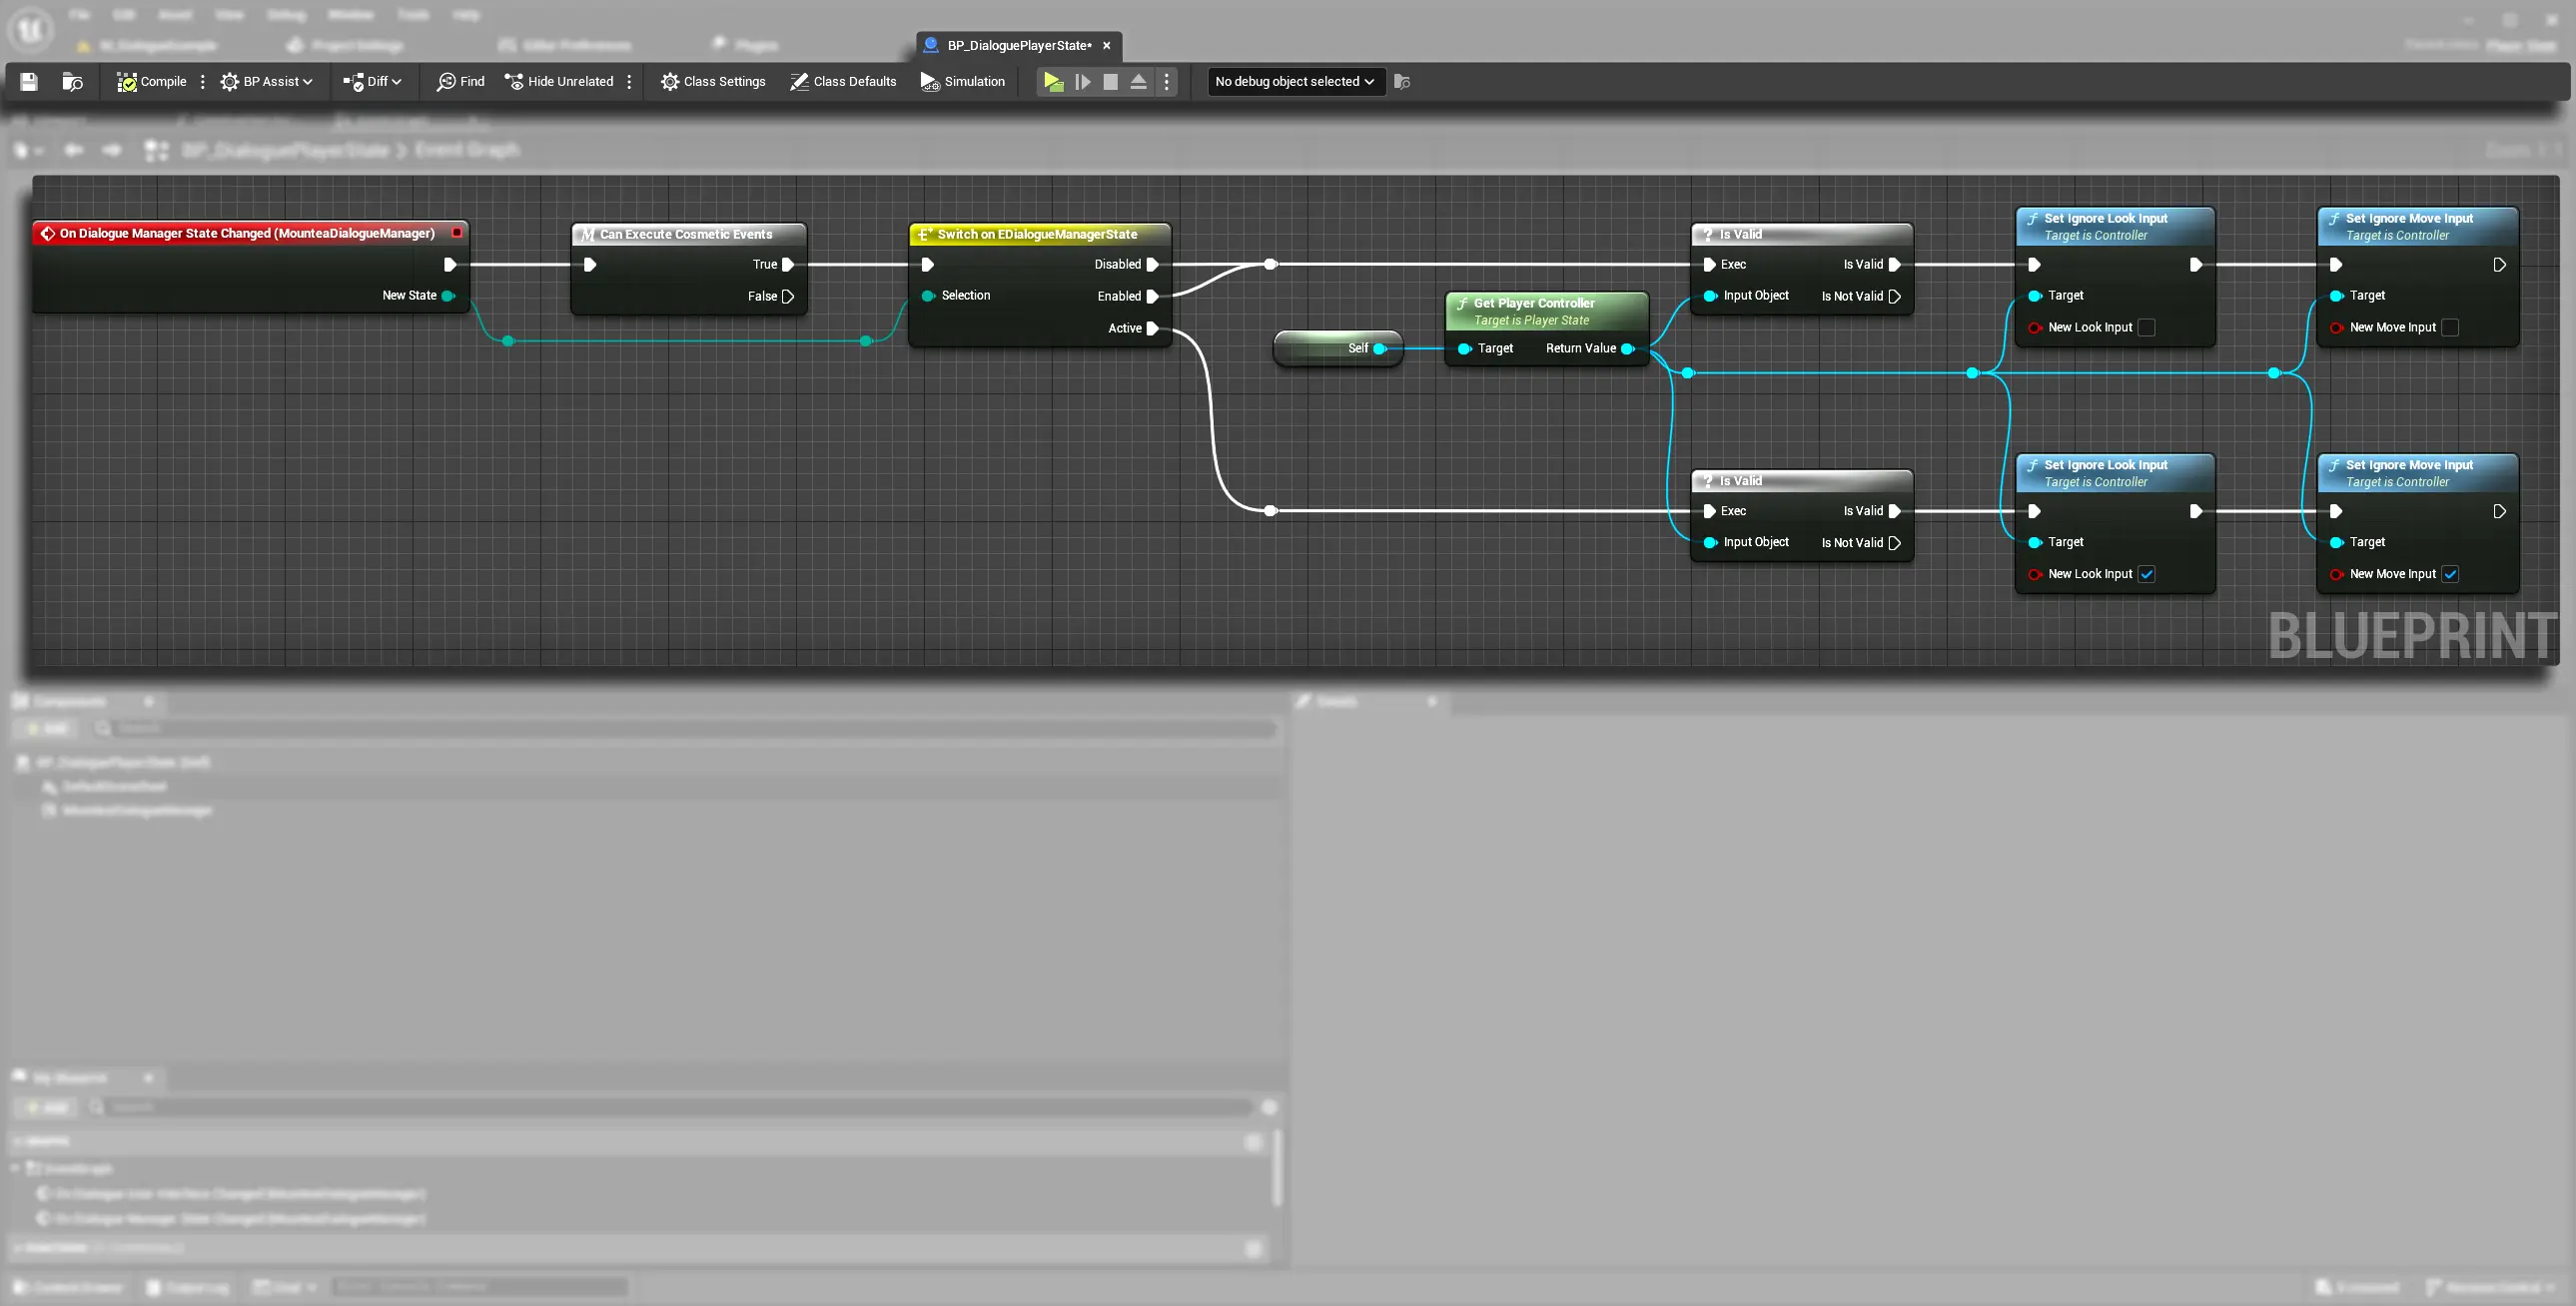
- A Mountea Dialogue Manager component attached to your Player State (see Setup Dialogue Manager).
- Mountea Dialogue Participant components on every Actor that will speak or respond (see Setup Dialogue Participant).
- The Dialogue Manager’s Manager State set to Enabled (default on BeginPlay).
1.1. Game Mode
Game Mode defines the game’s rules and default classes (GameMode, PlayerController, Pawn, etc.) for a given level. You can create or choose a custom Game Mode in Project Settings → Maps & Modes or override it per‑level in World Settings.
- Unreal Doc: GameMode Overview
- The Mountea plugin ships with an BP_DialogueGameMode you can assign to your level’s World Settings and which already has all classes ready for Dialogue.
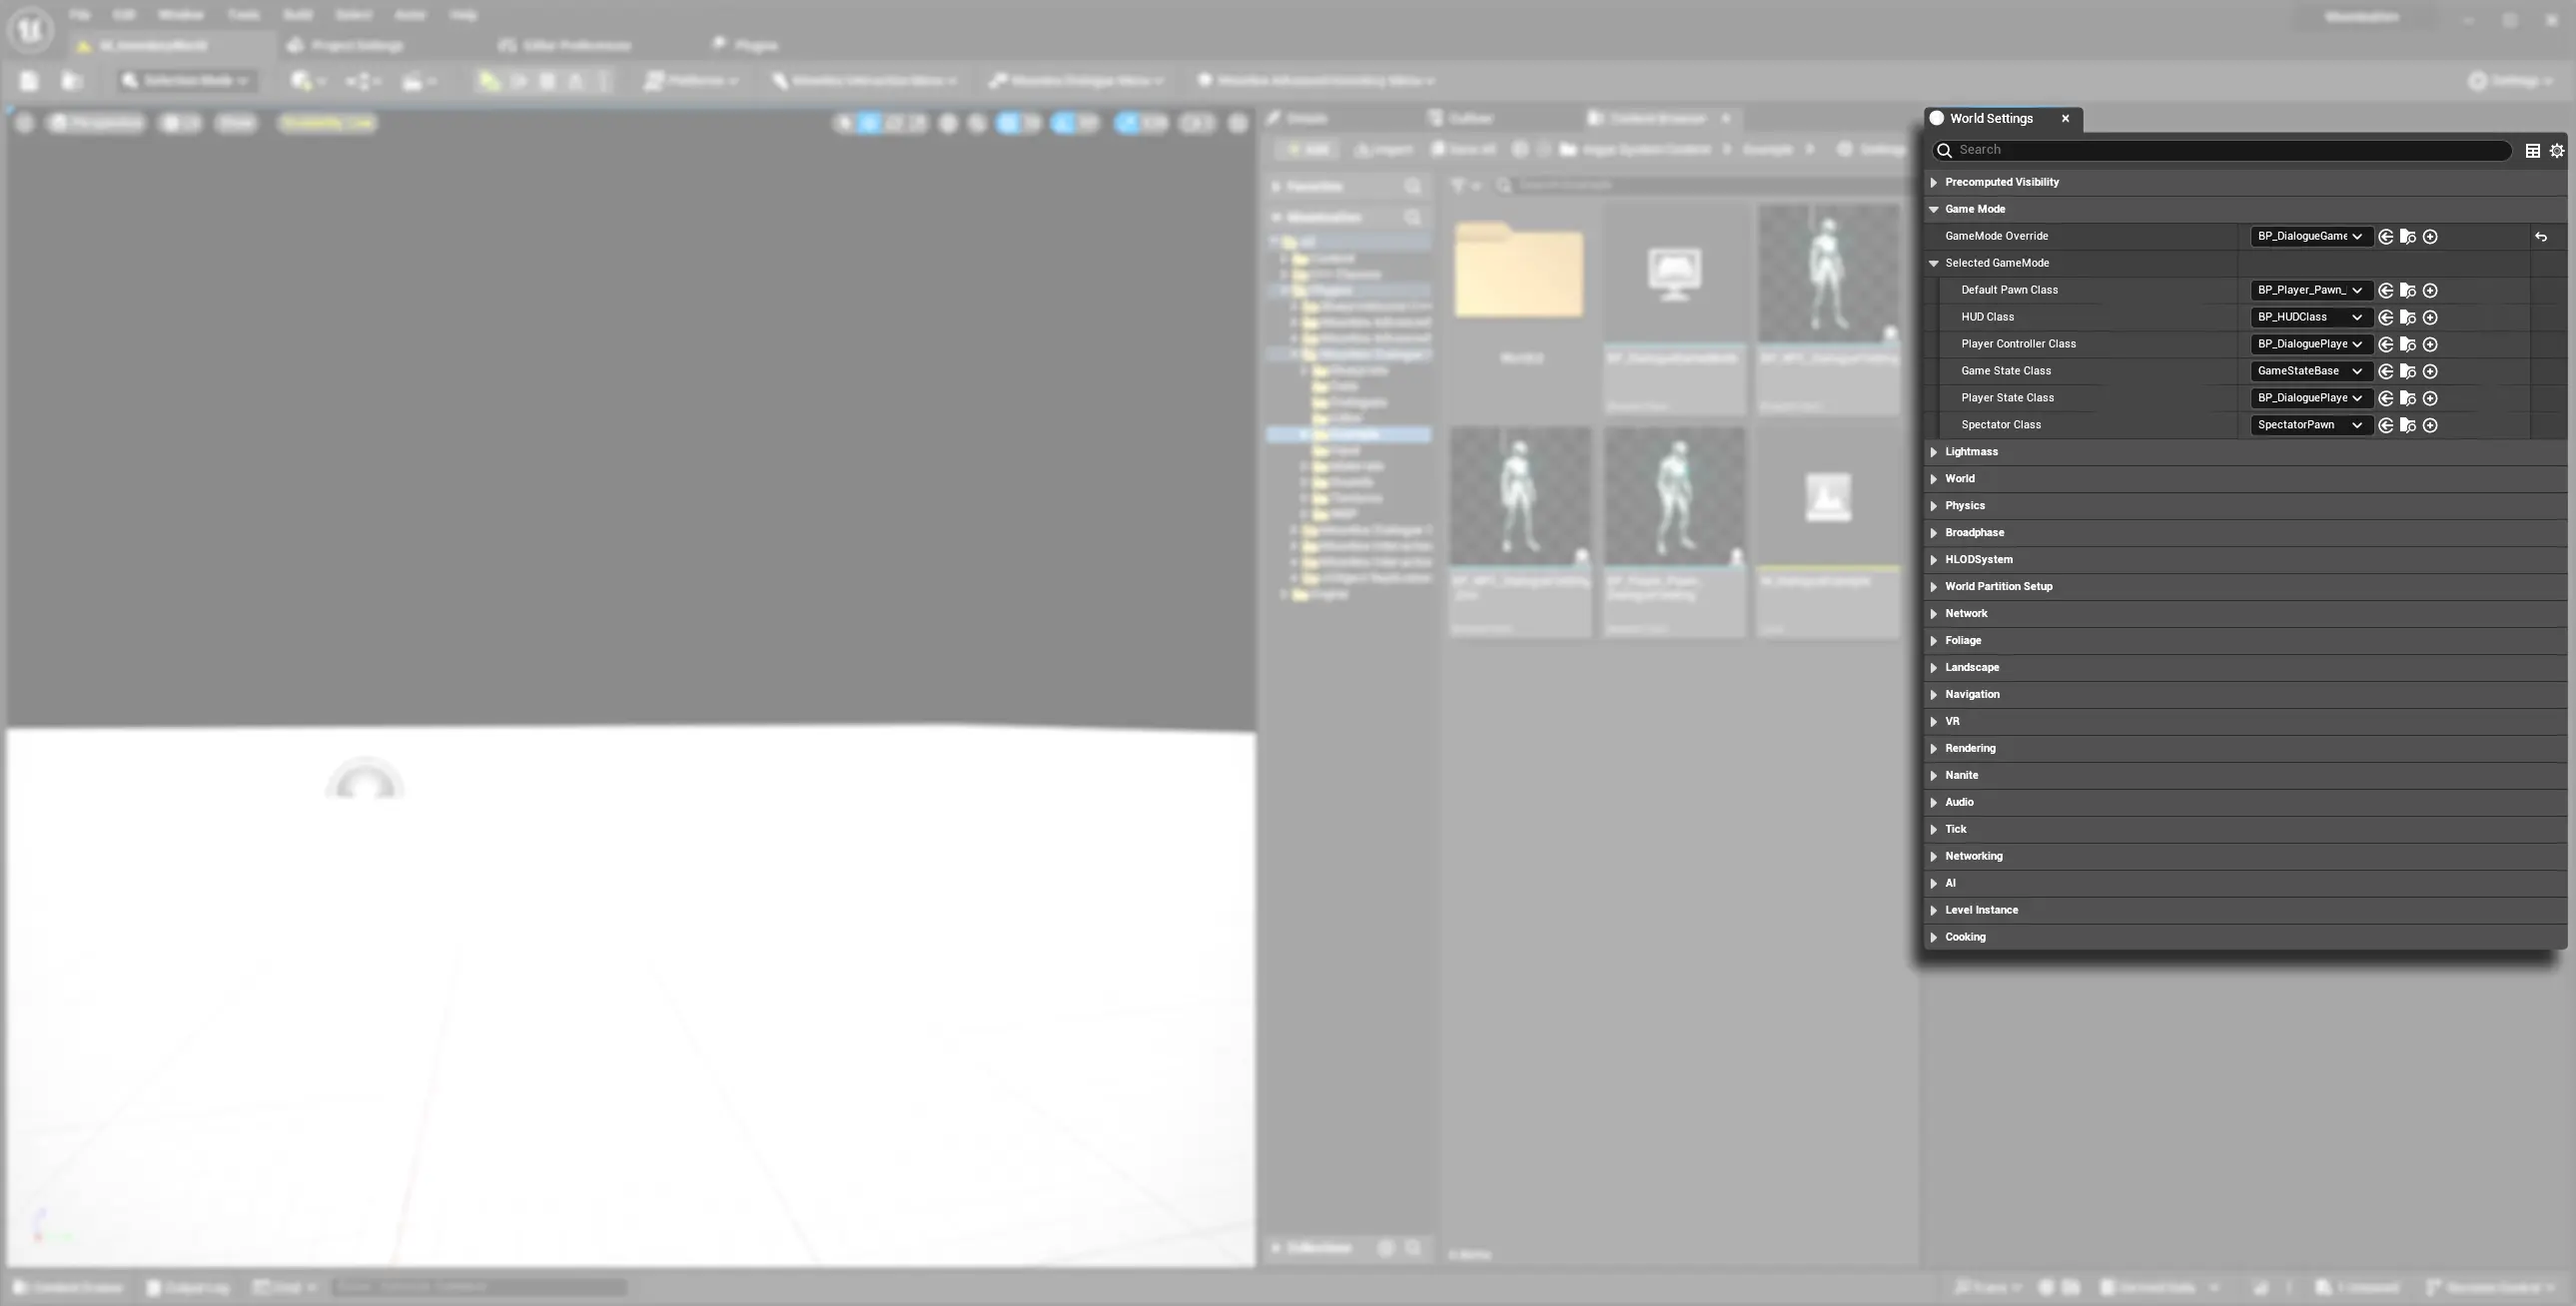
1.2. Player State
Player State persists per‑player data across the network and between level transitions. It’s ideal for holding replicated data like scores, resources—and in our case, the Dialogue Manager component.
- Unreal Doc: PlayerState Class
- All clients automatically receive each other’s PlayerState, ensuring synchronized dialogue context in multiplayer.
1.3. Player Controller
Player Controller manages input and high‑level player logic on both client and server. For dialogue, it typically binds skip/advance commands and initializes the UI.
- Unreal Doc: PlayerController Class
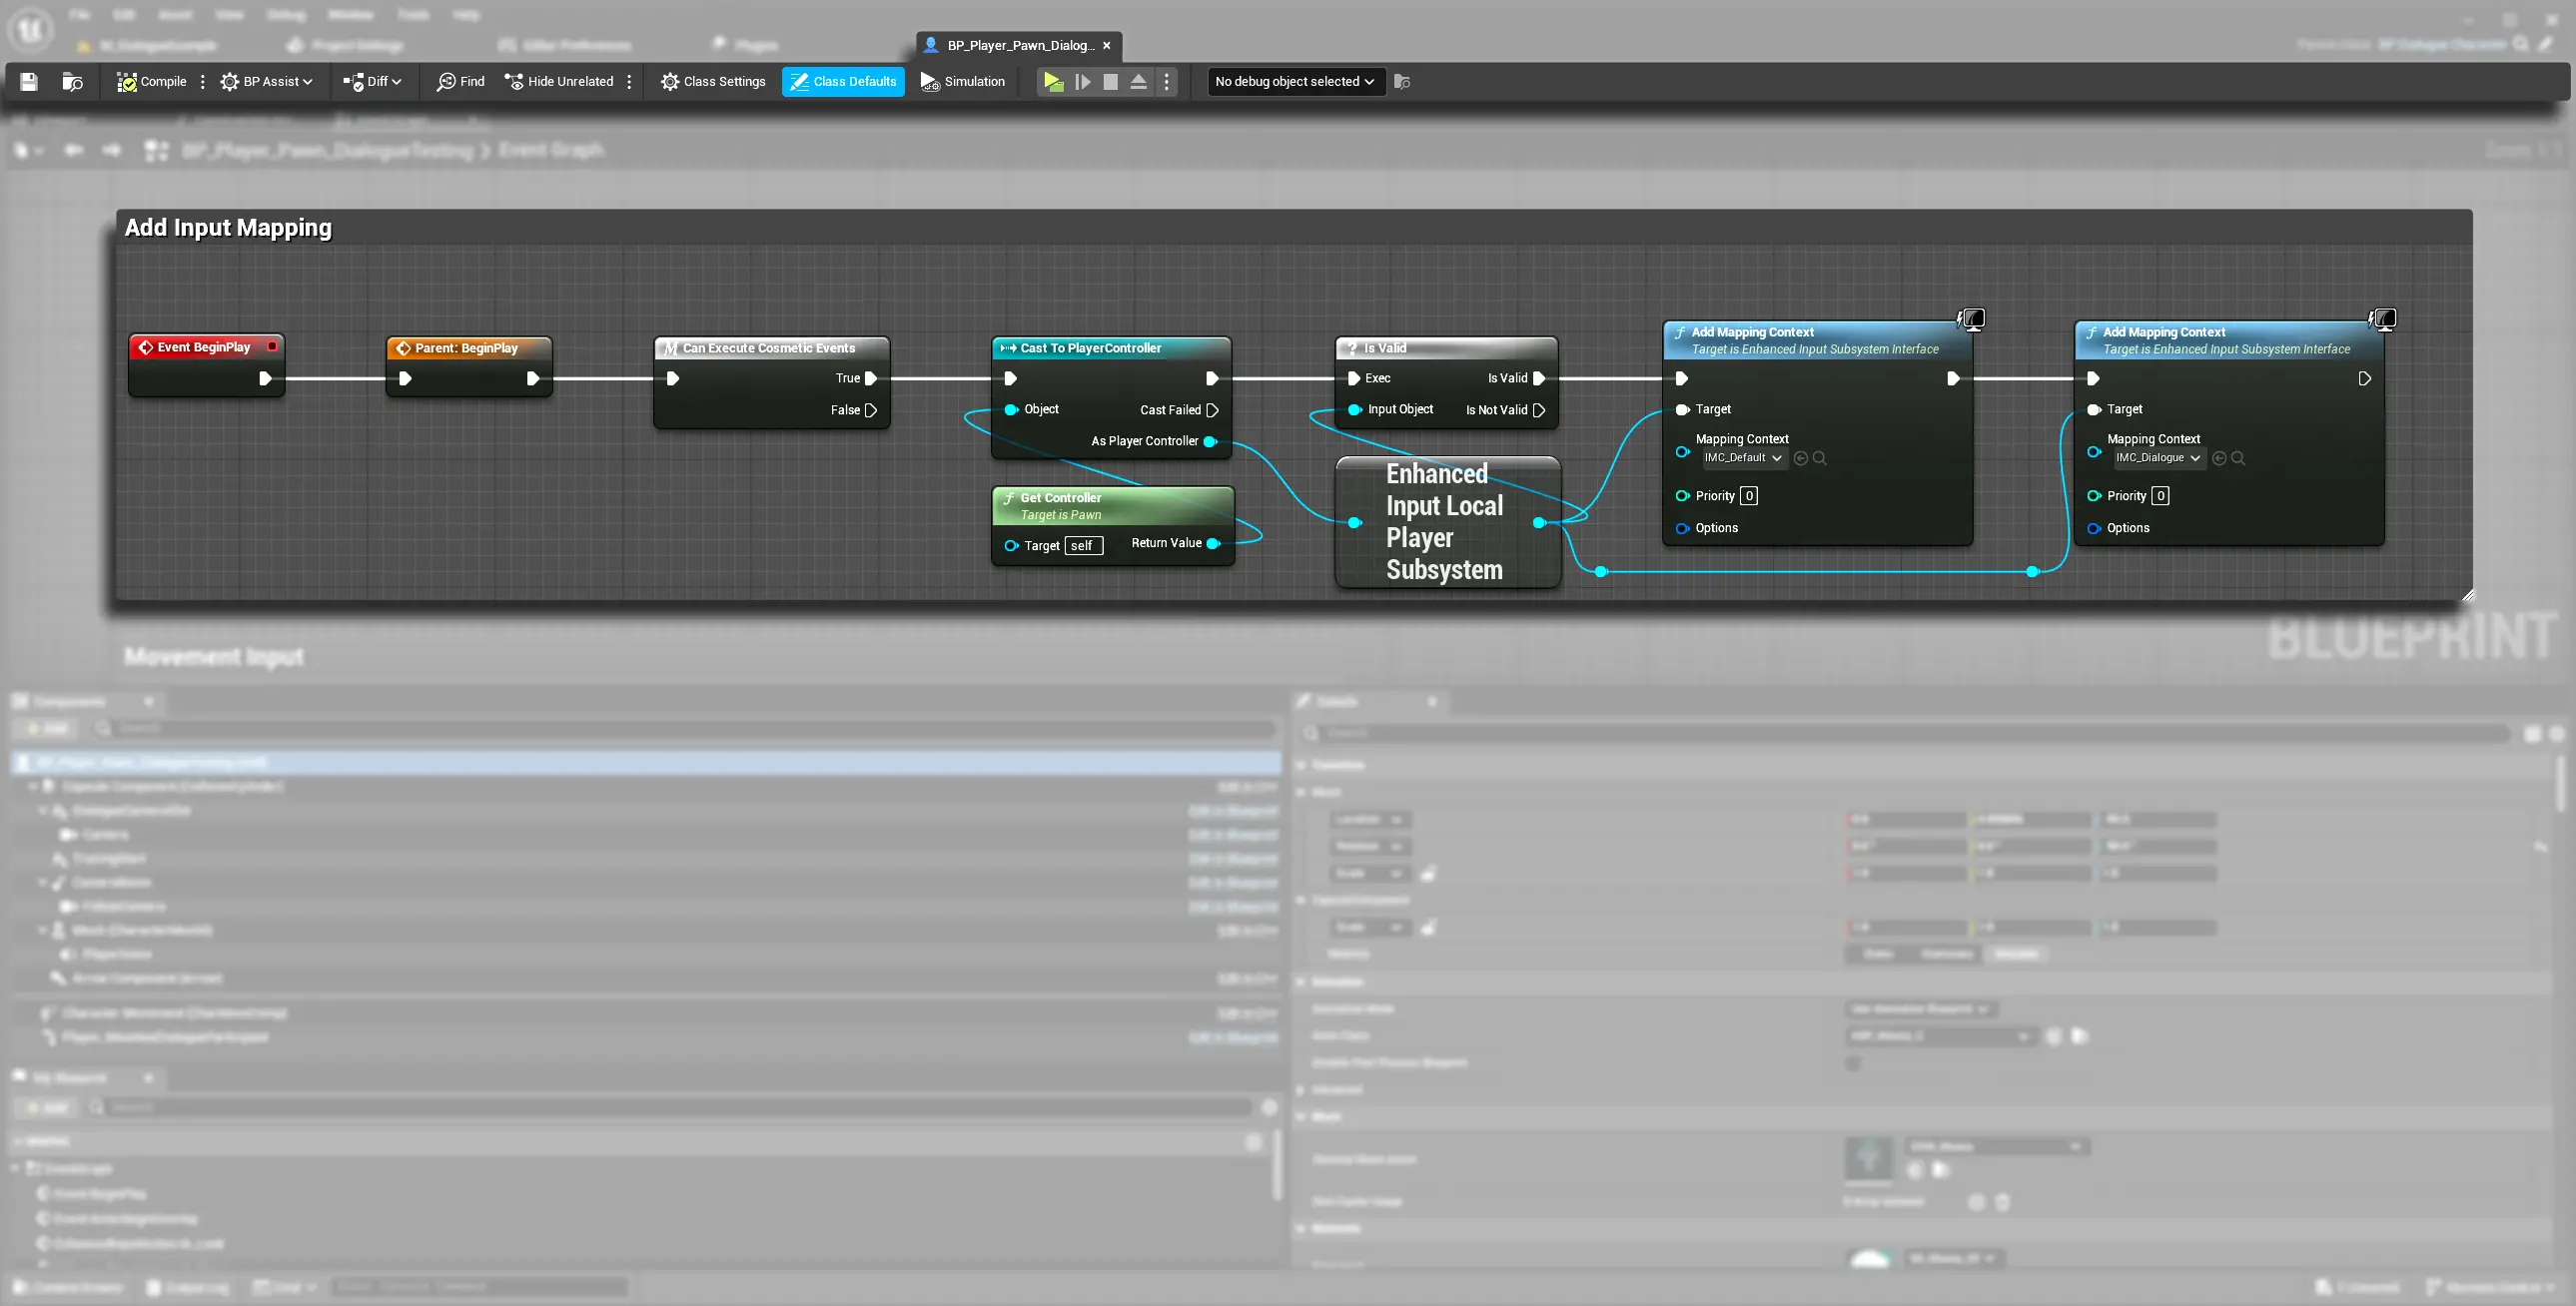
1.4. Player Pawn
Pawn (often your character or vehicle) represents the physical entity the player controls. The Pawn handles input mapping (keyboard/mouse/gamepad) that drives dialogue interactions.
- Unreal Doc: Pawn Class
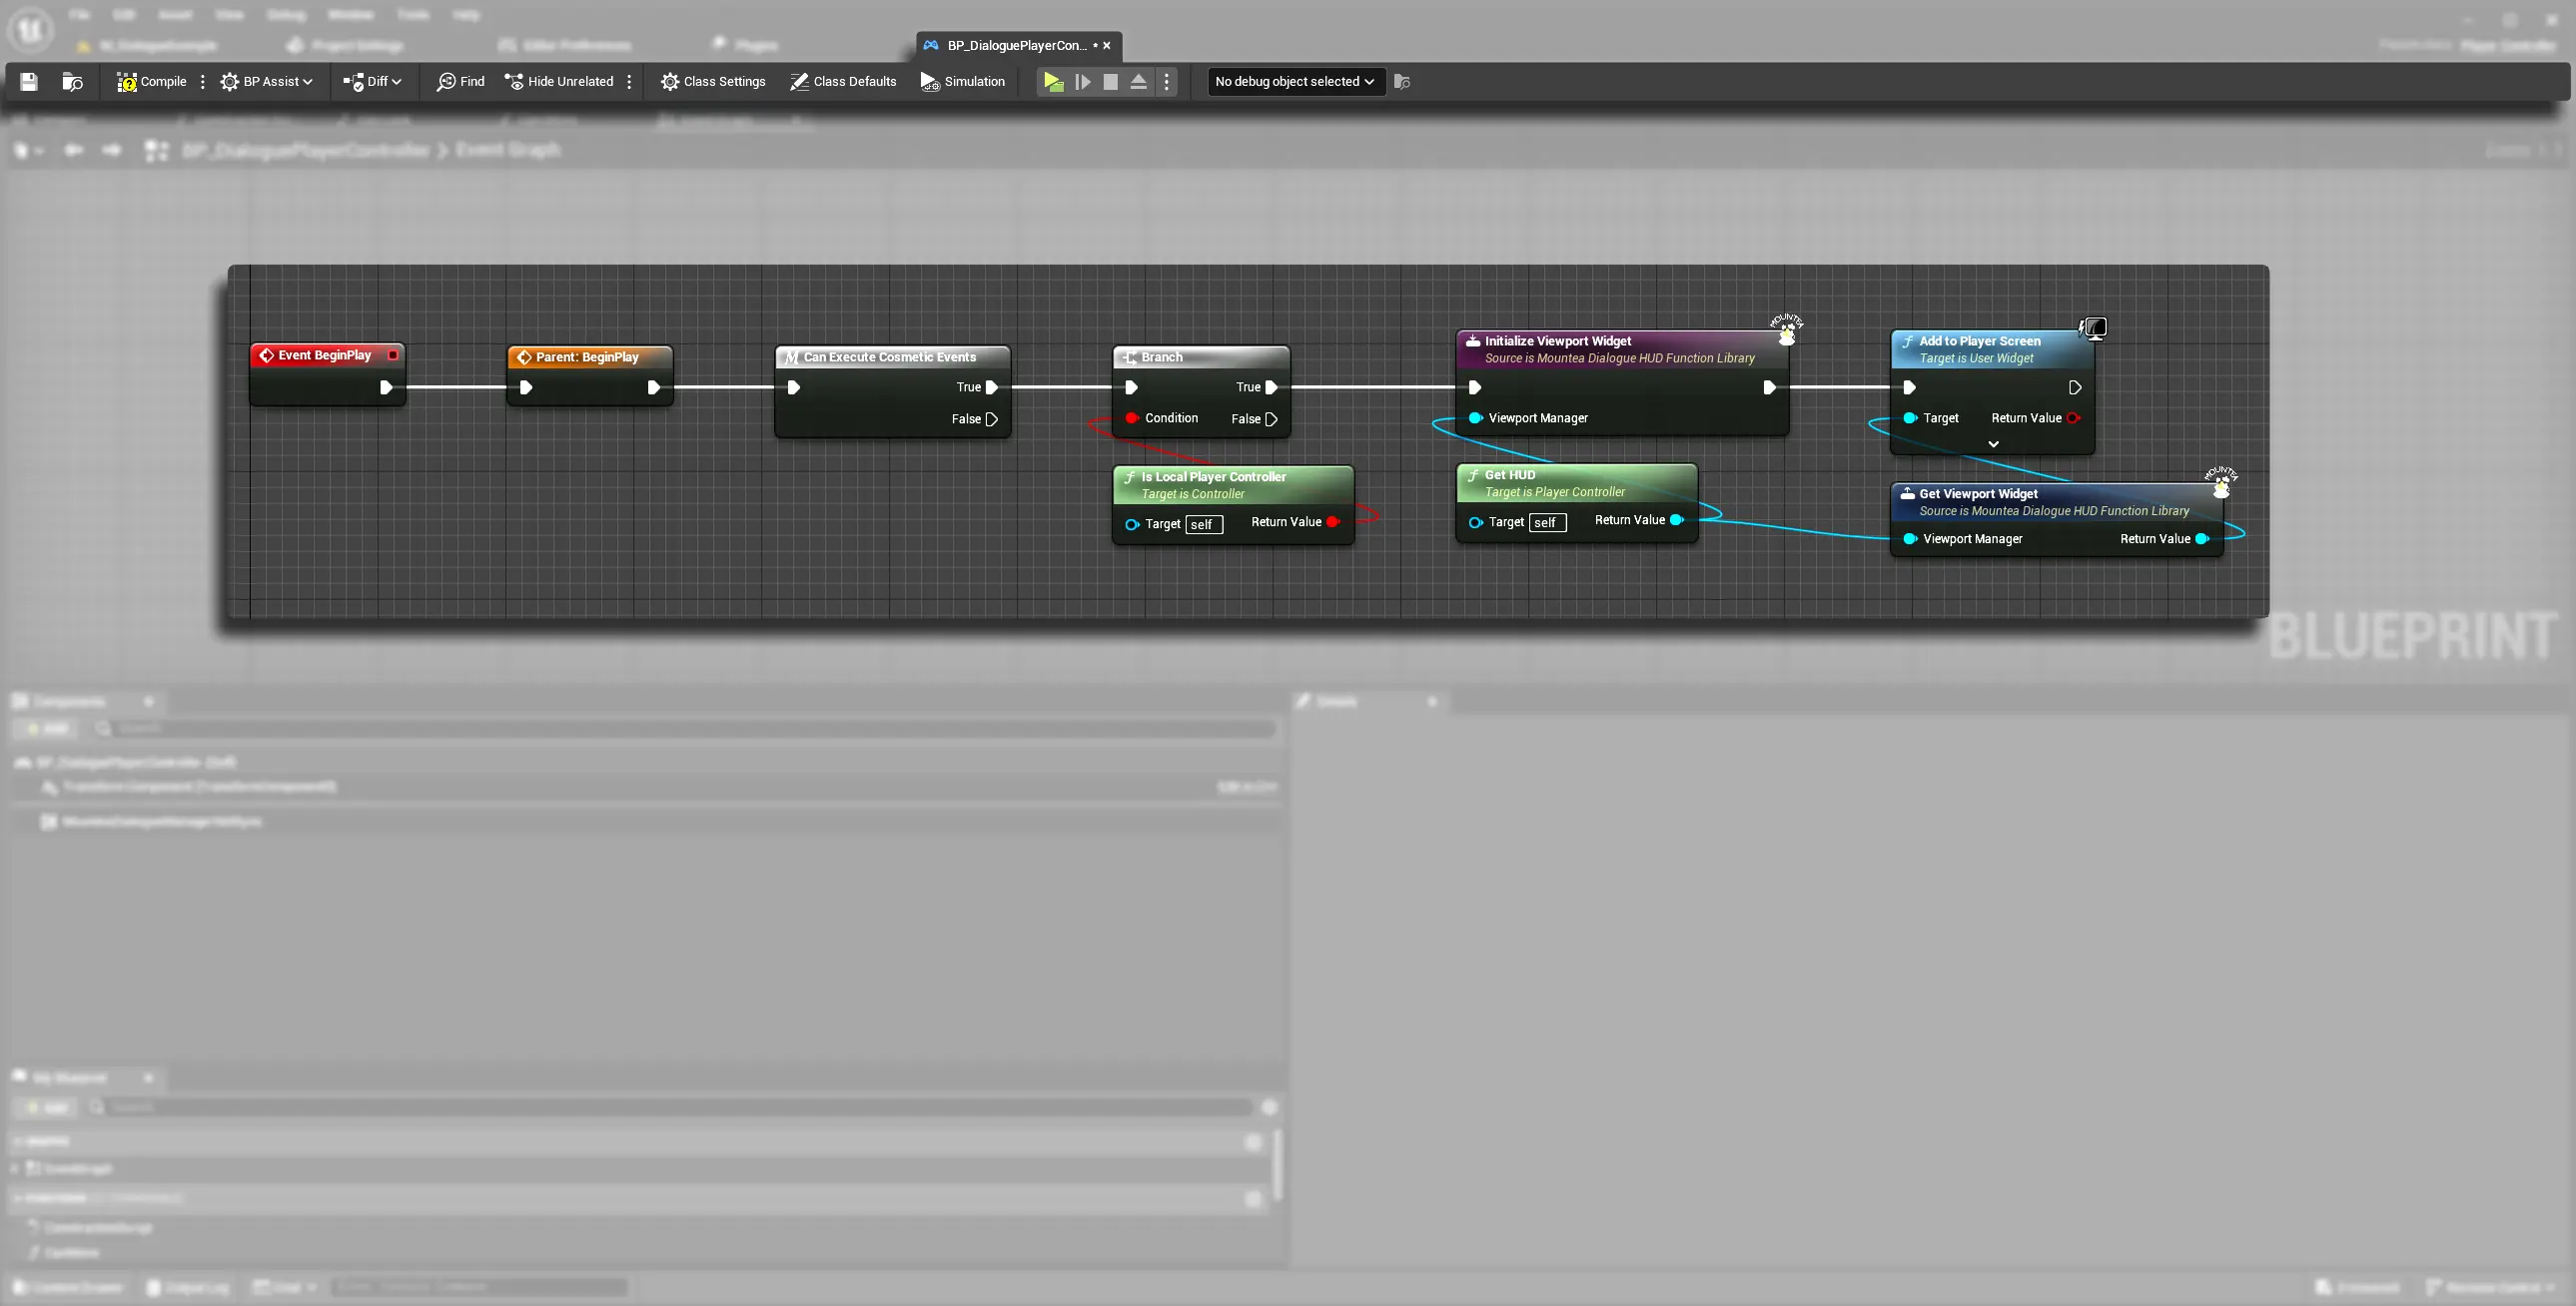
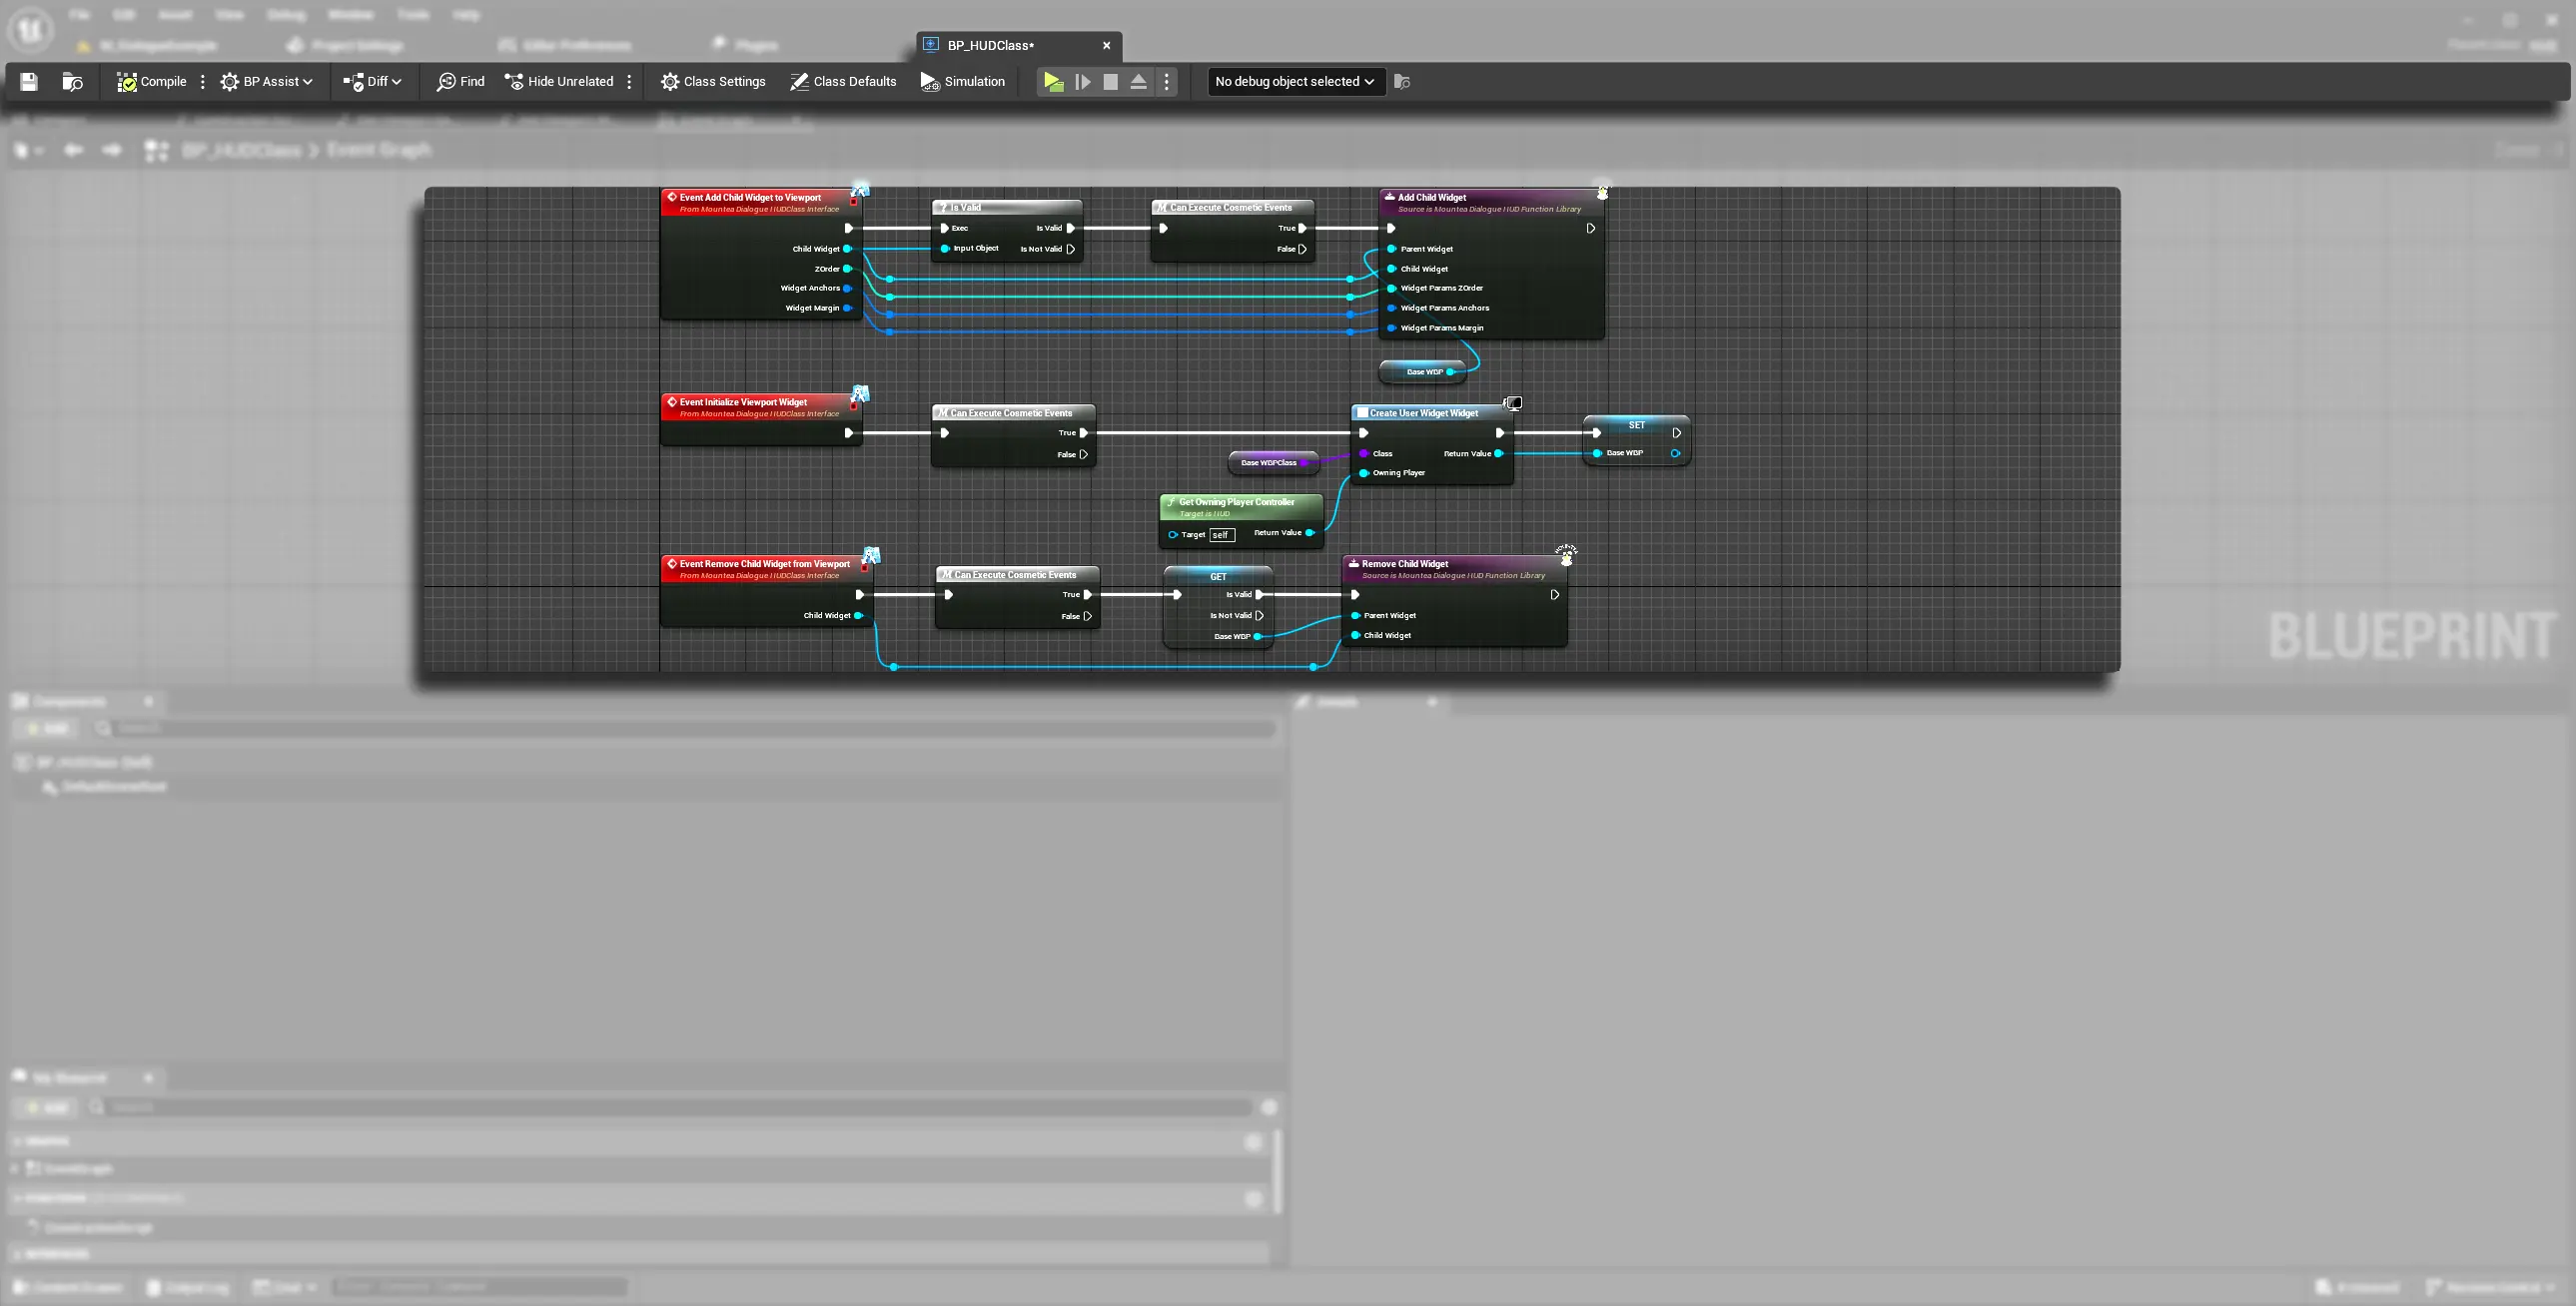
1.5. HUD Class
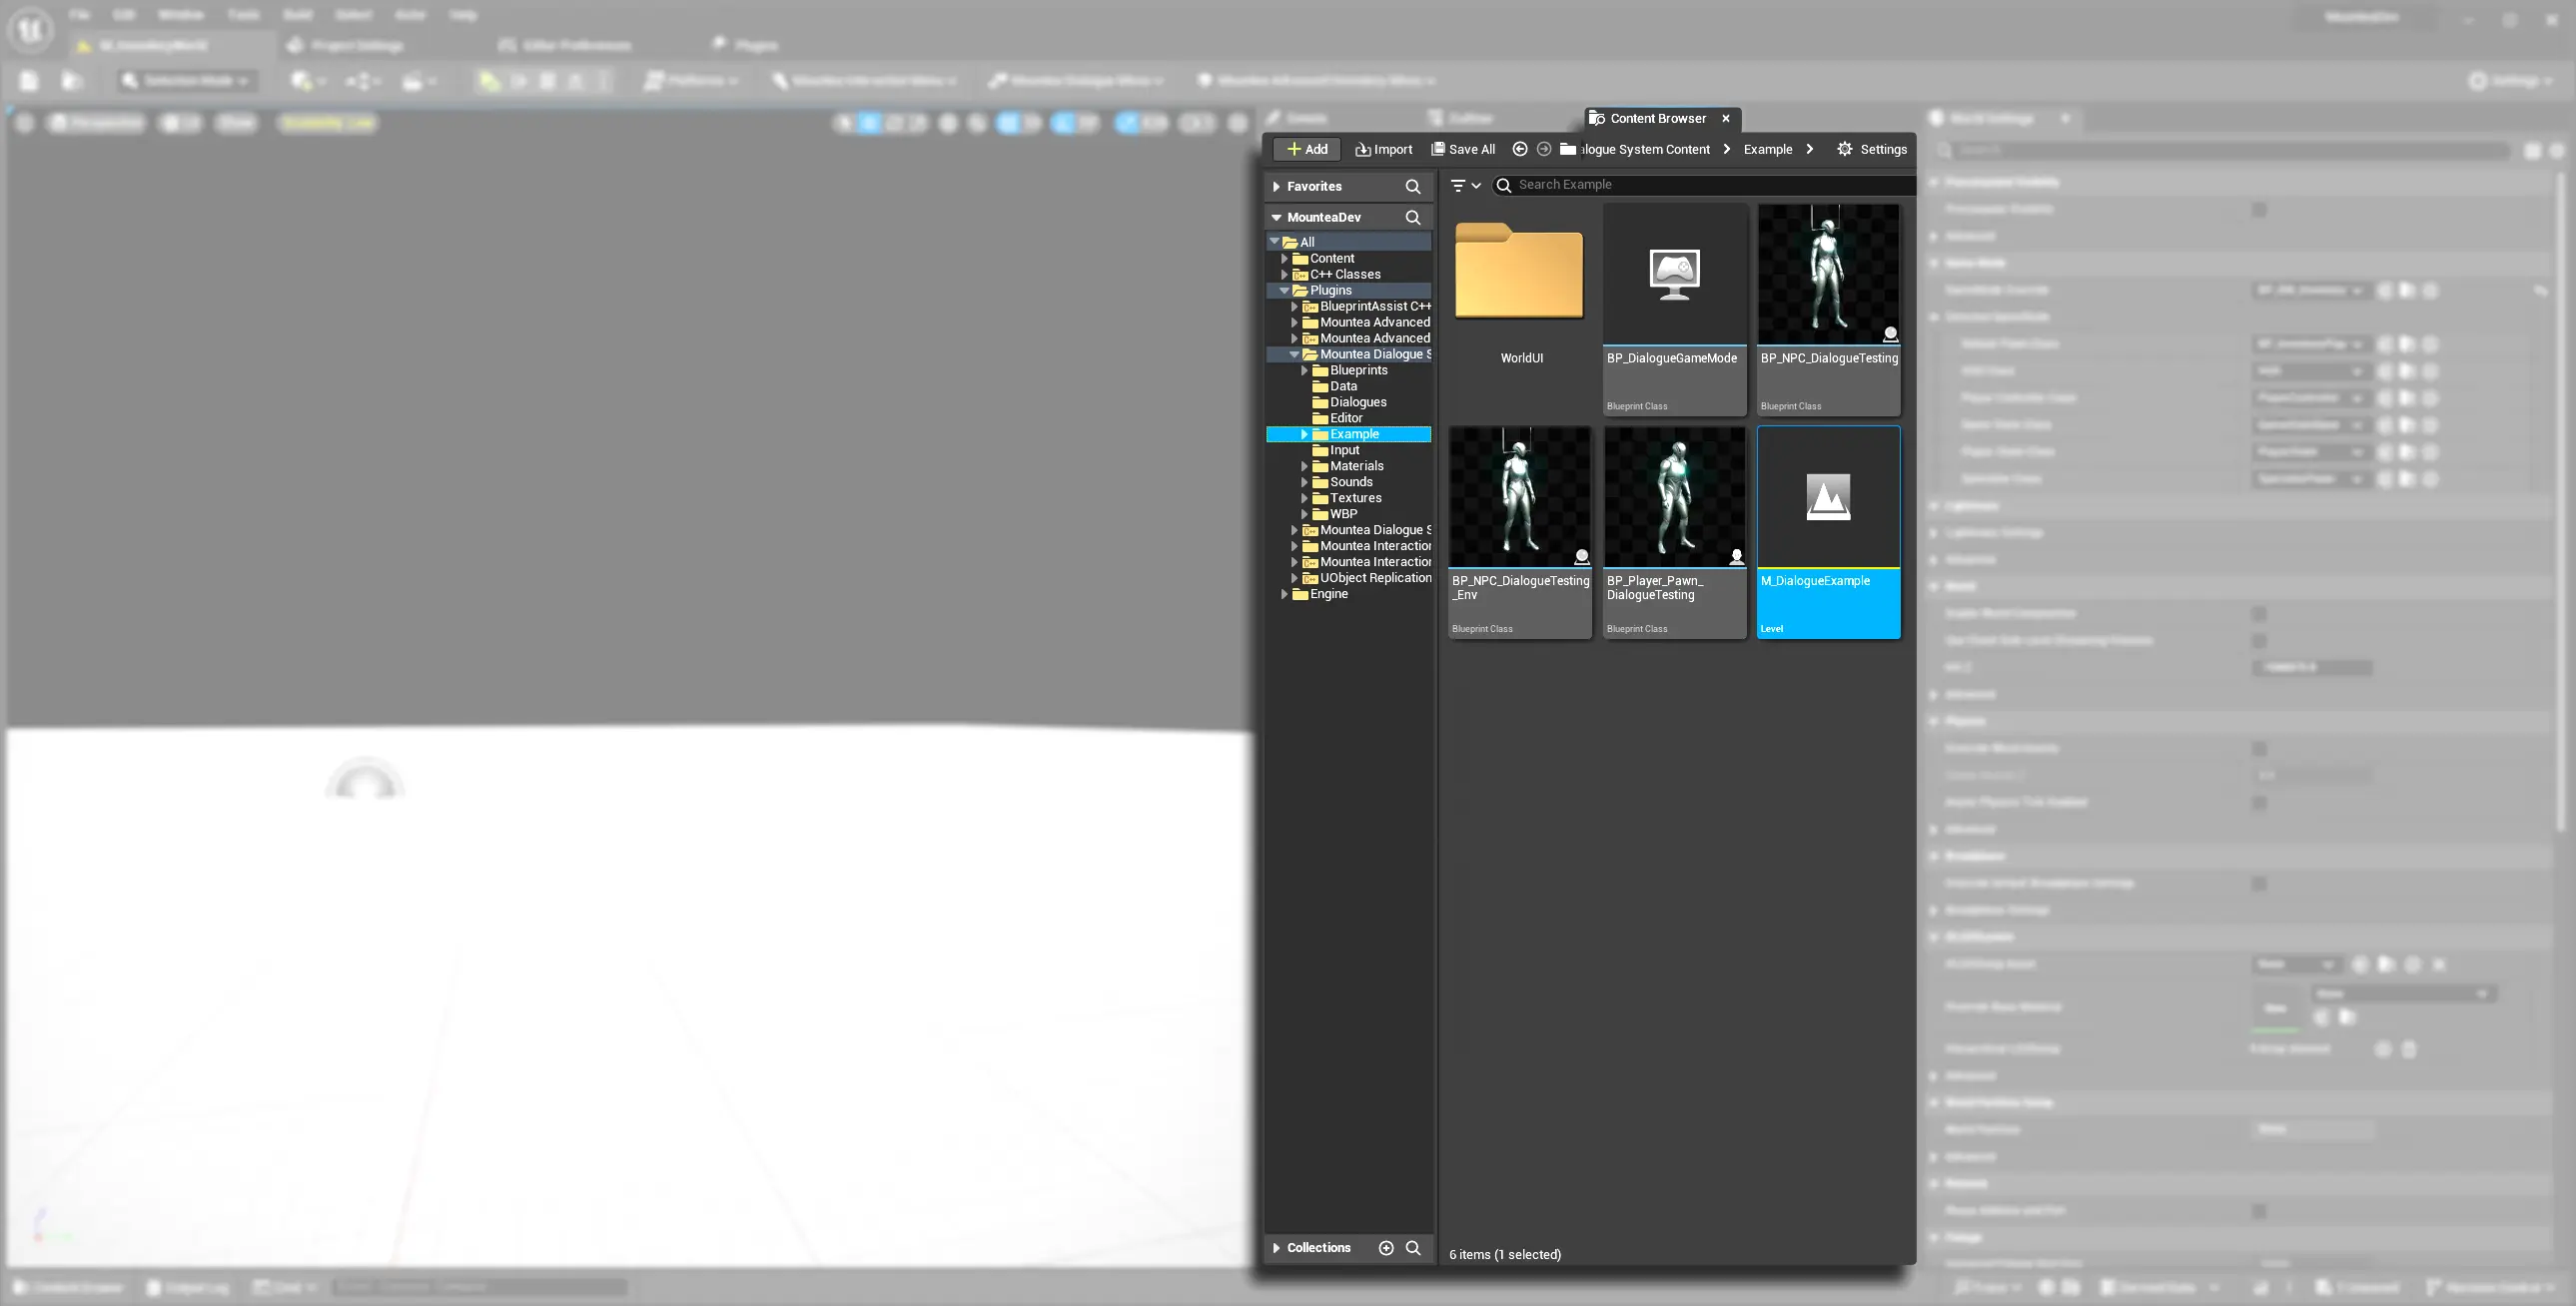
HUD manages on‑screen UI layers for a local single player. In the Example map, the HUD creates an empty Canvas Panel that serves as the parent for dialogue, inventory, and other widgets.
- Unreal Doc: HUD Class
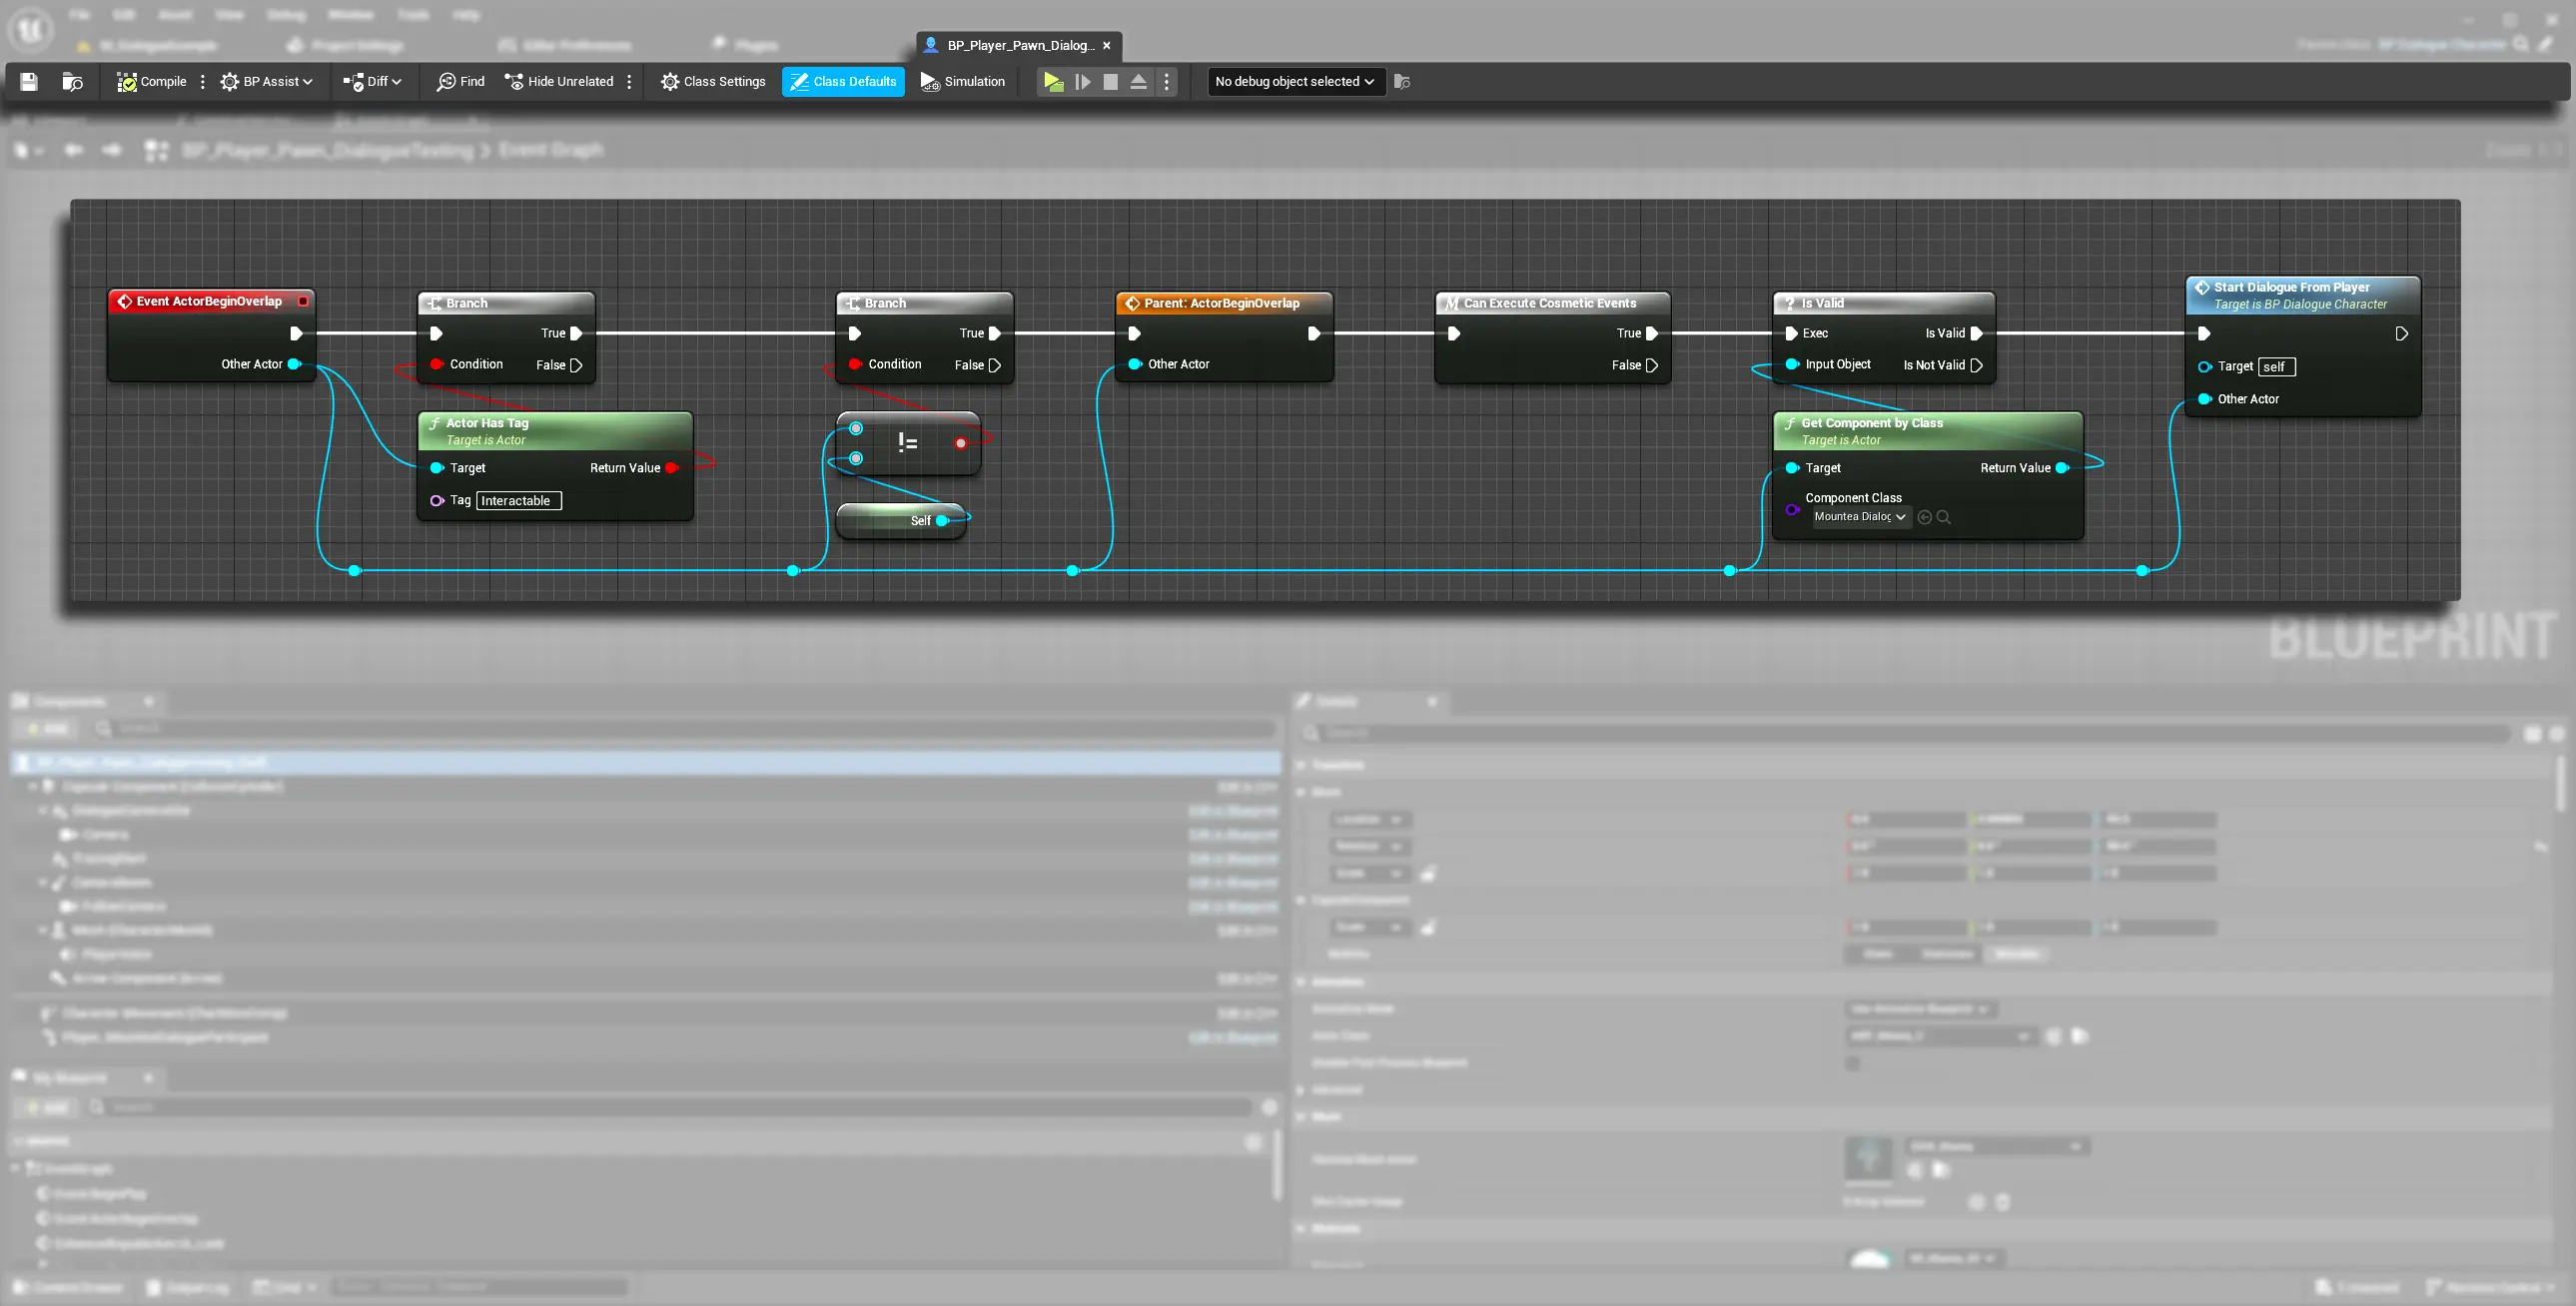
2. Invoking “Start Dialogue”
2.1 Blueprint
- Get a reference to your Dialogue Manager component (you can use
GetDialogueManagerfunction). - Drag off the output pin and search for “Request Start Dialogue”.
- Specify:
- Dialogue Initiator: the Actor (often your Player Controller or Pawn) that triggers the conversation.
- Main Participant: the Actor implementing
IMounteaDialogueParticipantInterfacewhose graph will drive the session which is usually the Player or the NPC. - Other Participants: an array of additional participants (e.g., Player Pawn or NPC).
- Bind to the OnDialogueStartRequestedResult event to handle success or failure.
Use Example Code
In the Example map there is already Player and NPCs setup to start the dialogue. Take a look at those and take some inspiration! Just keep in mind that the code is not production ready, it is meant to be used as inspiration only!
2.2 C++ API
This function is responsible for calling the Dialogue to start:
UFUNCTION(BlueprintCallable, Category="Mountea|Dialogue")
void RequestStartDialogue(AActor* DialogueInitiator, const FDialogueParticipants& InitialParticipants);
- DialogueInitiator: Actor that instigates the dialogue.
- InitialParticipants.MainParticipant: must implement
CanStartDialogue()successfully. - InitialParticipants.OtherParticipants: optional array of Actors to add.
Bind to the OnDialogueStartRequestedResult delegate:
DialogueManager->OnDialogueStartRequestedResult.AddDynamic(this, &UMyClass::HandleStartResult);
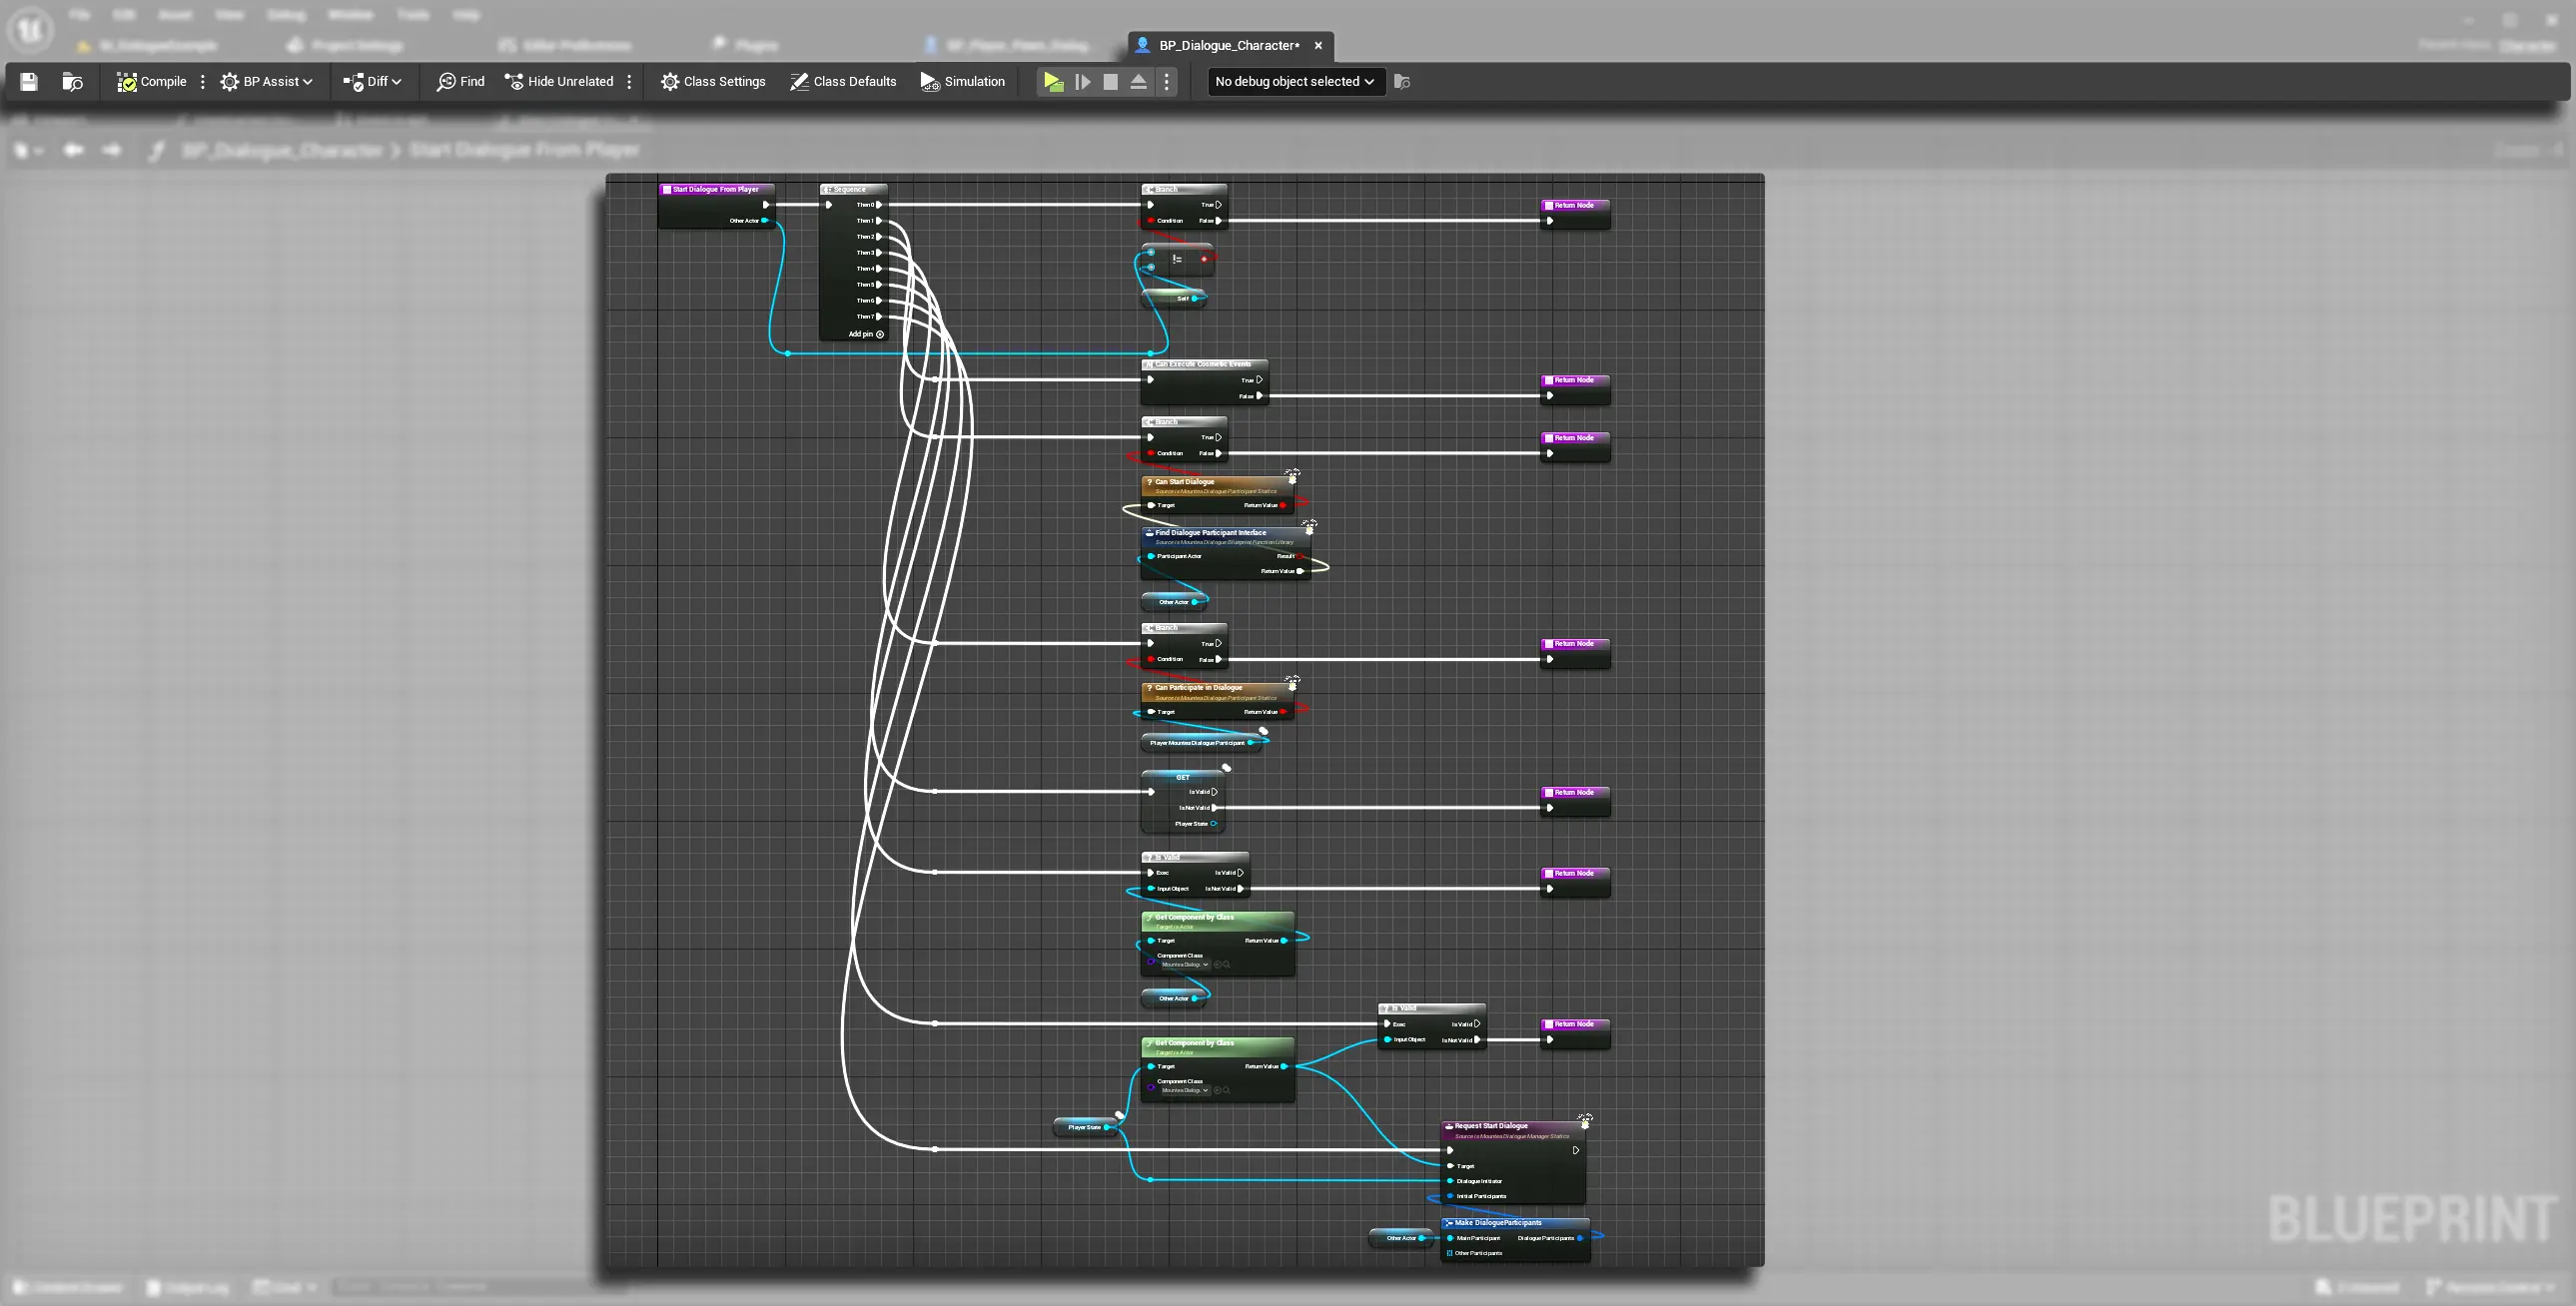
3. Under‑the‑Hood Workflow
When you call RequestStartDialogue, the manager runs:
- Validate Inputs
- Checks
DialogueInitiatorisn’t null. - Ensures
MainParticipantis valid andCanStartDialogue()returns true.
- Checks
- Gather Participants
- Adds the main participant and inspects
OtherParticipants, filtering byCanParticipateInDialogue.
- Adds the main participant and inspects
- Setup by Manager Type
- Player Dialogue: verifies a valid Player Pawn and its Participant component (
SetupPlayerDialogue). - Environment Dialogue: ensures a NetSync component on the Player Controller (
SetupEnvironmentDialogue).
- Player Dialogue: verifies a valid Player Pawn and its Participant component (
- Create Dialogue Context
- Calls
CreateDialogueContext(...), initializing node pointers, participant list, and the first active node.
- Calls
- Dispatch to Server / Client
- On clients, issues a server RPC (
RequestStartDialogue_Server). - On server, broadcasts OnDialogueStartRequestedResult to signal readiness.
- On clients, issues a server RPC (
If all checks pass, the manager’s ManagerState transitions to Active, invoking StartDialogue() and spawning the UI.
4. Handling the Result
Bind OnDialogueStartRequestedResult which supplies:
- bool bSuccess: true if dialogue began
- FString Message: “OK” or detailed error(s)
Example Blueprint flow:
Request Start Dialogue → OnDialogueStartRequestedResult
  ├─ if Success: proceed to UI
  └─ if Failure: display Message in log or on HUD
5. Authority & Networking
- Authority (Server) is responsible for creating the
DialogueContextand changingManagerState. - Clients automatically queue their start request and await replication before proceeding.
- The UI creation and node preparation happen once
ManagerState == Active.
6. Common Errors
| Error Key | Description |
|---|---|
MissingInitiator |
DialogueInitiator was null. |
MissingParticipant |
No MainParticipant supplied. |
CannotStart |
Manager is disabled or already active. |
InvalidPawn |
Player Pawn missing Participant component. |
NoNetSync |
Environment dialogue requires a NetSync component. |
ParticipantCannotStart |
Main Participant’s CanStartDialogue() returned false. |
Always check your log output for these keys to quickly pinpoint setup issues.