Configuring the Dialogue System
This guide is written for designers, narrative leads, and producers. You’ll learn how to set up your default UI, style subtitles, leverage built‑in and custom commands, adjust editor visuals, and follow best practices to keep your workflow smooth and consistent.
1. Tutorial Page
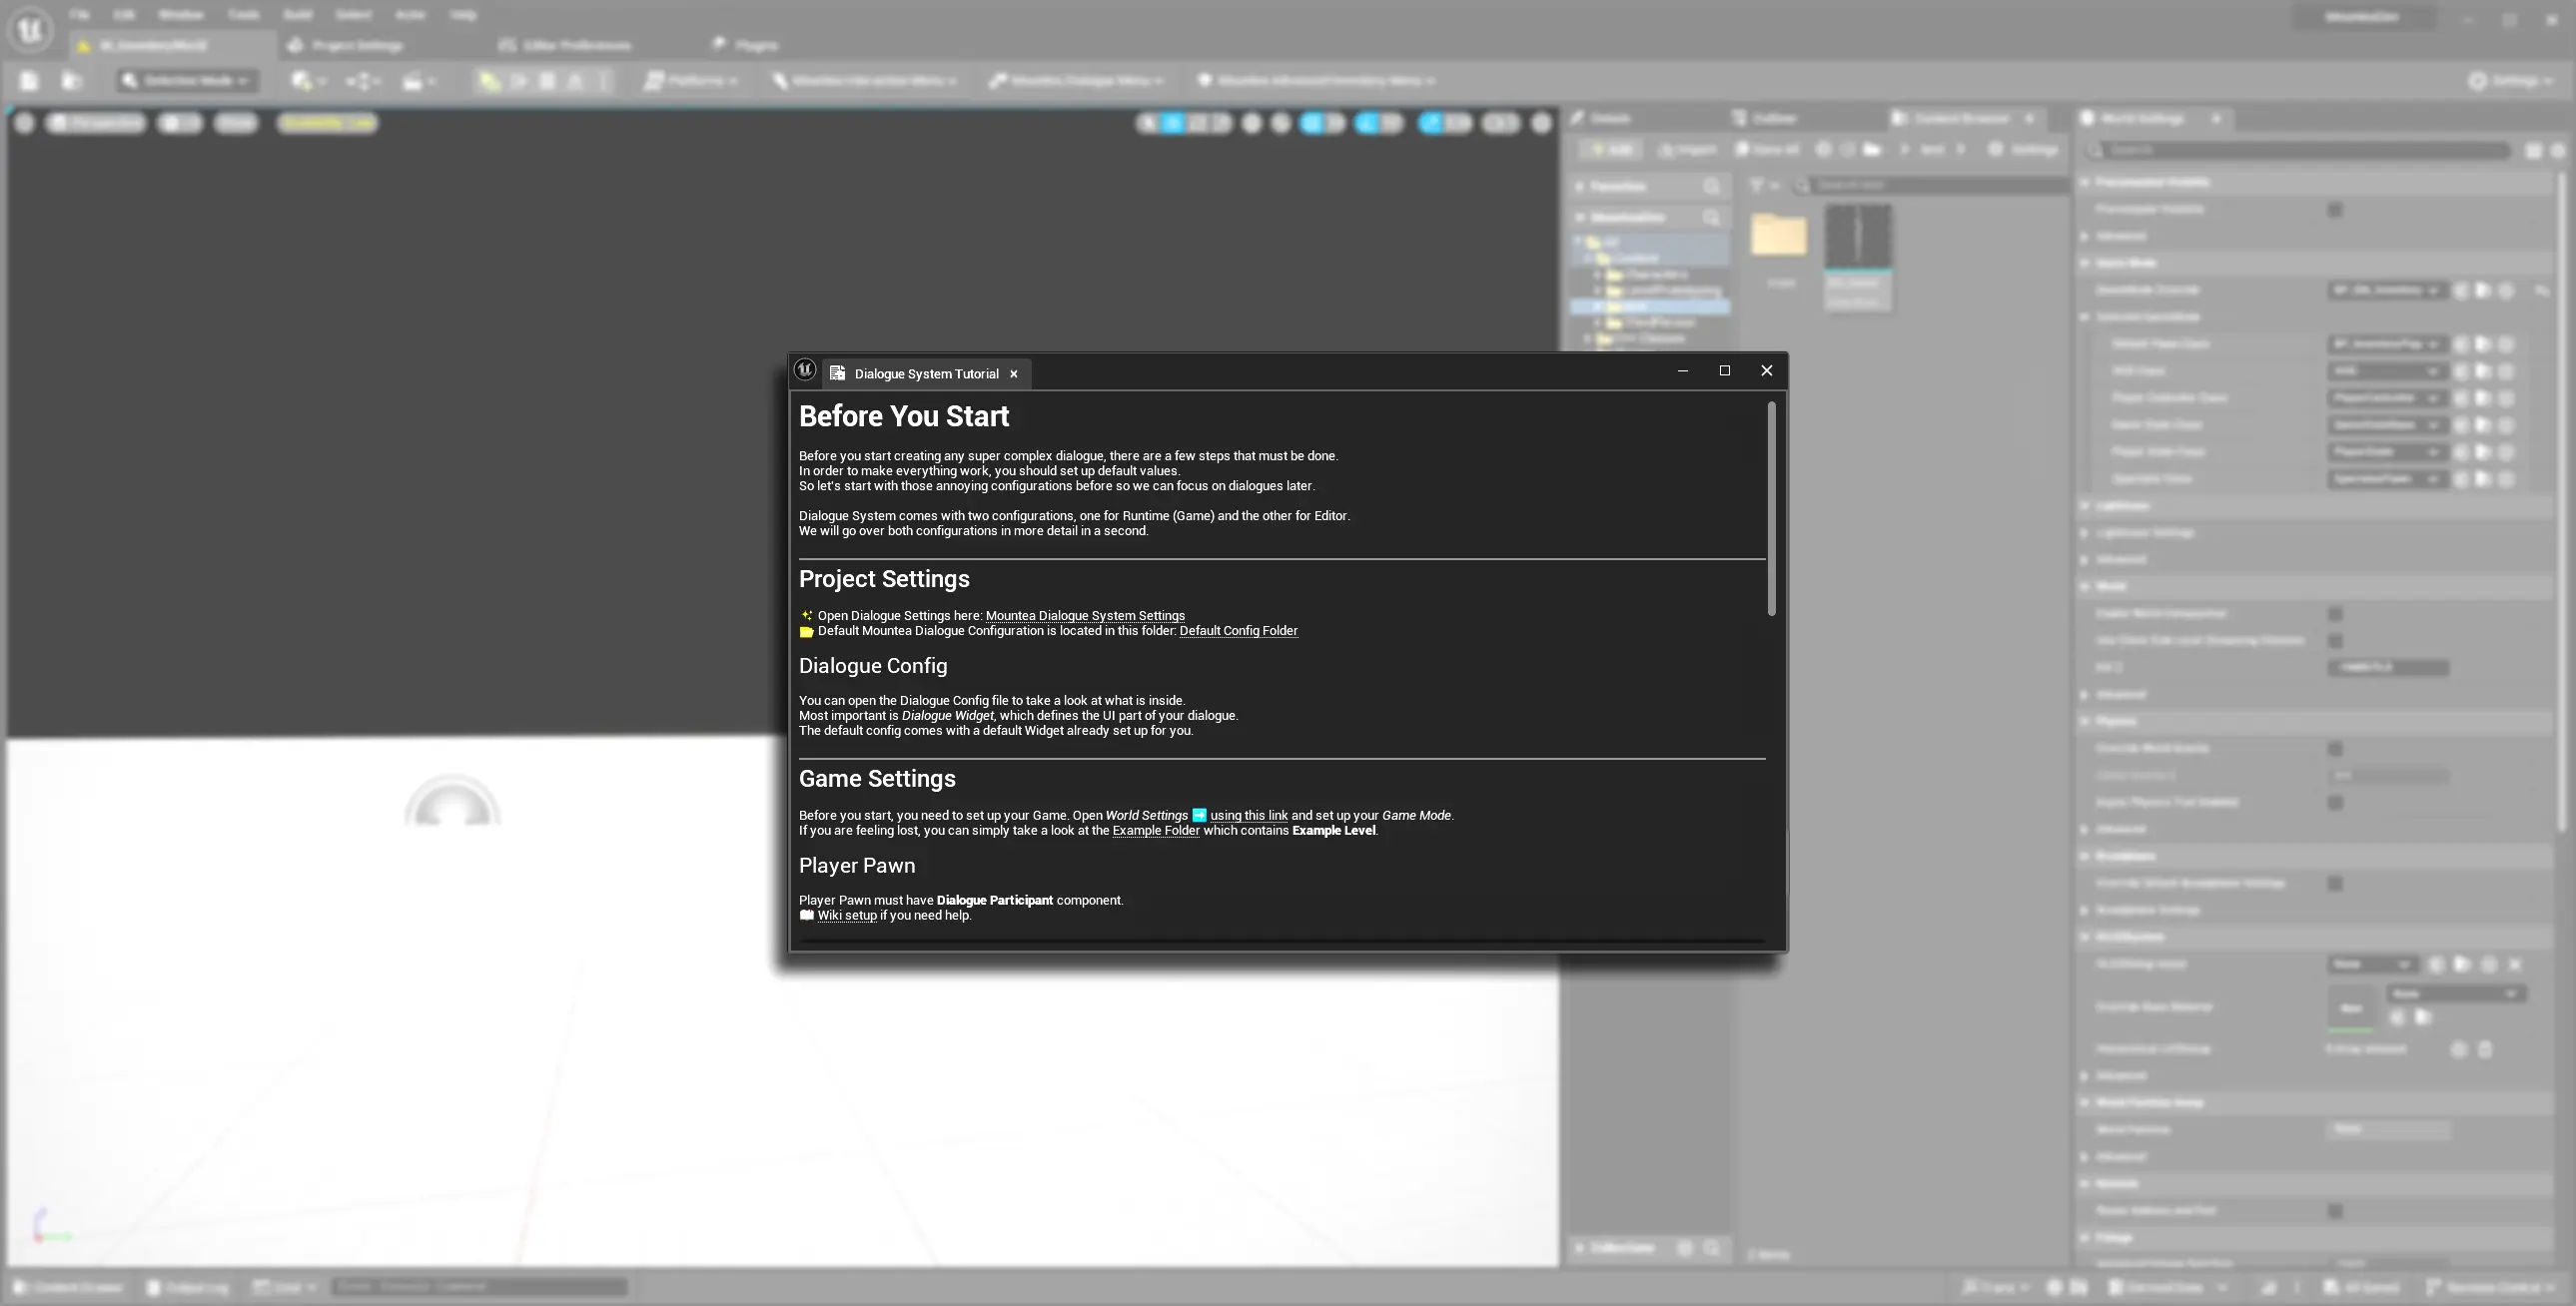
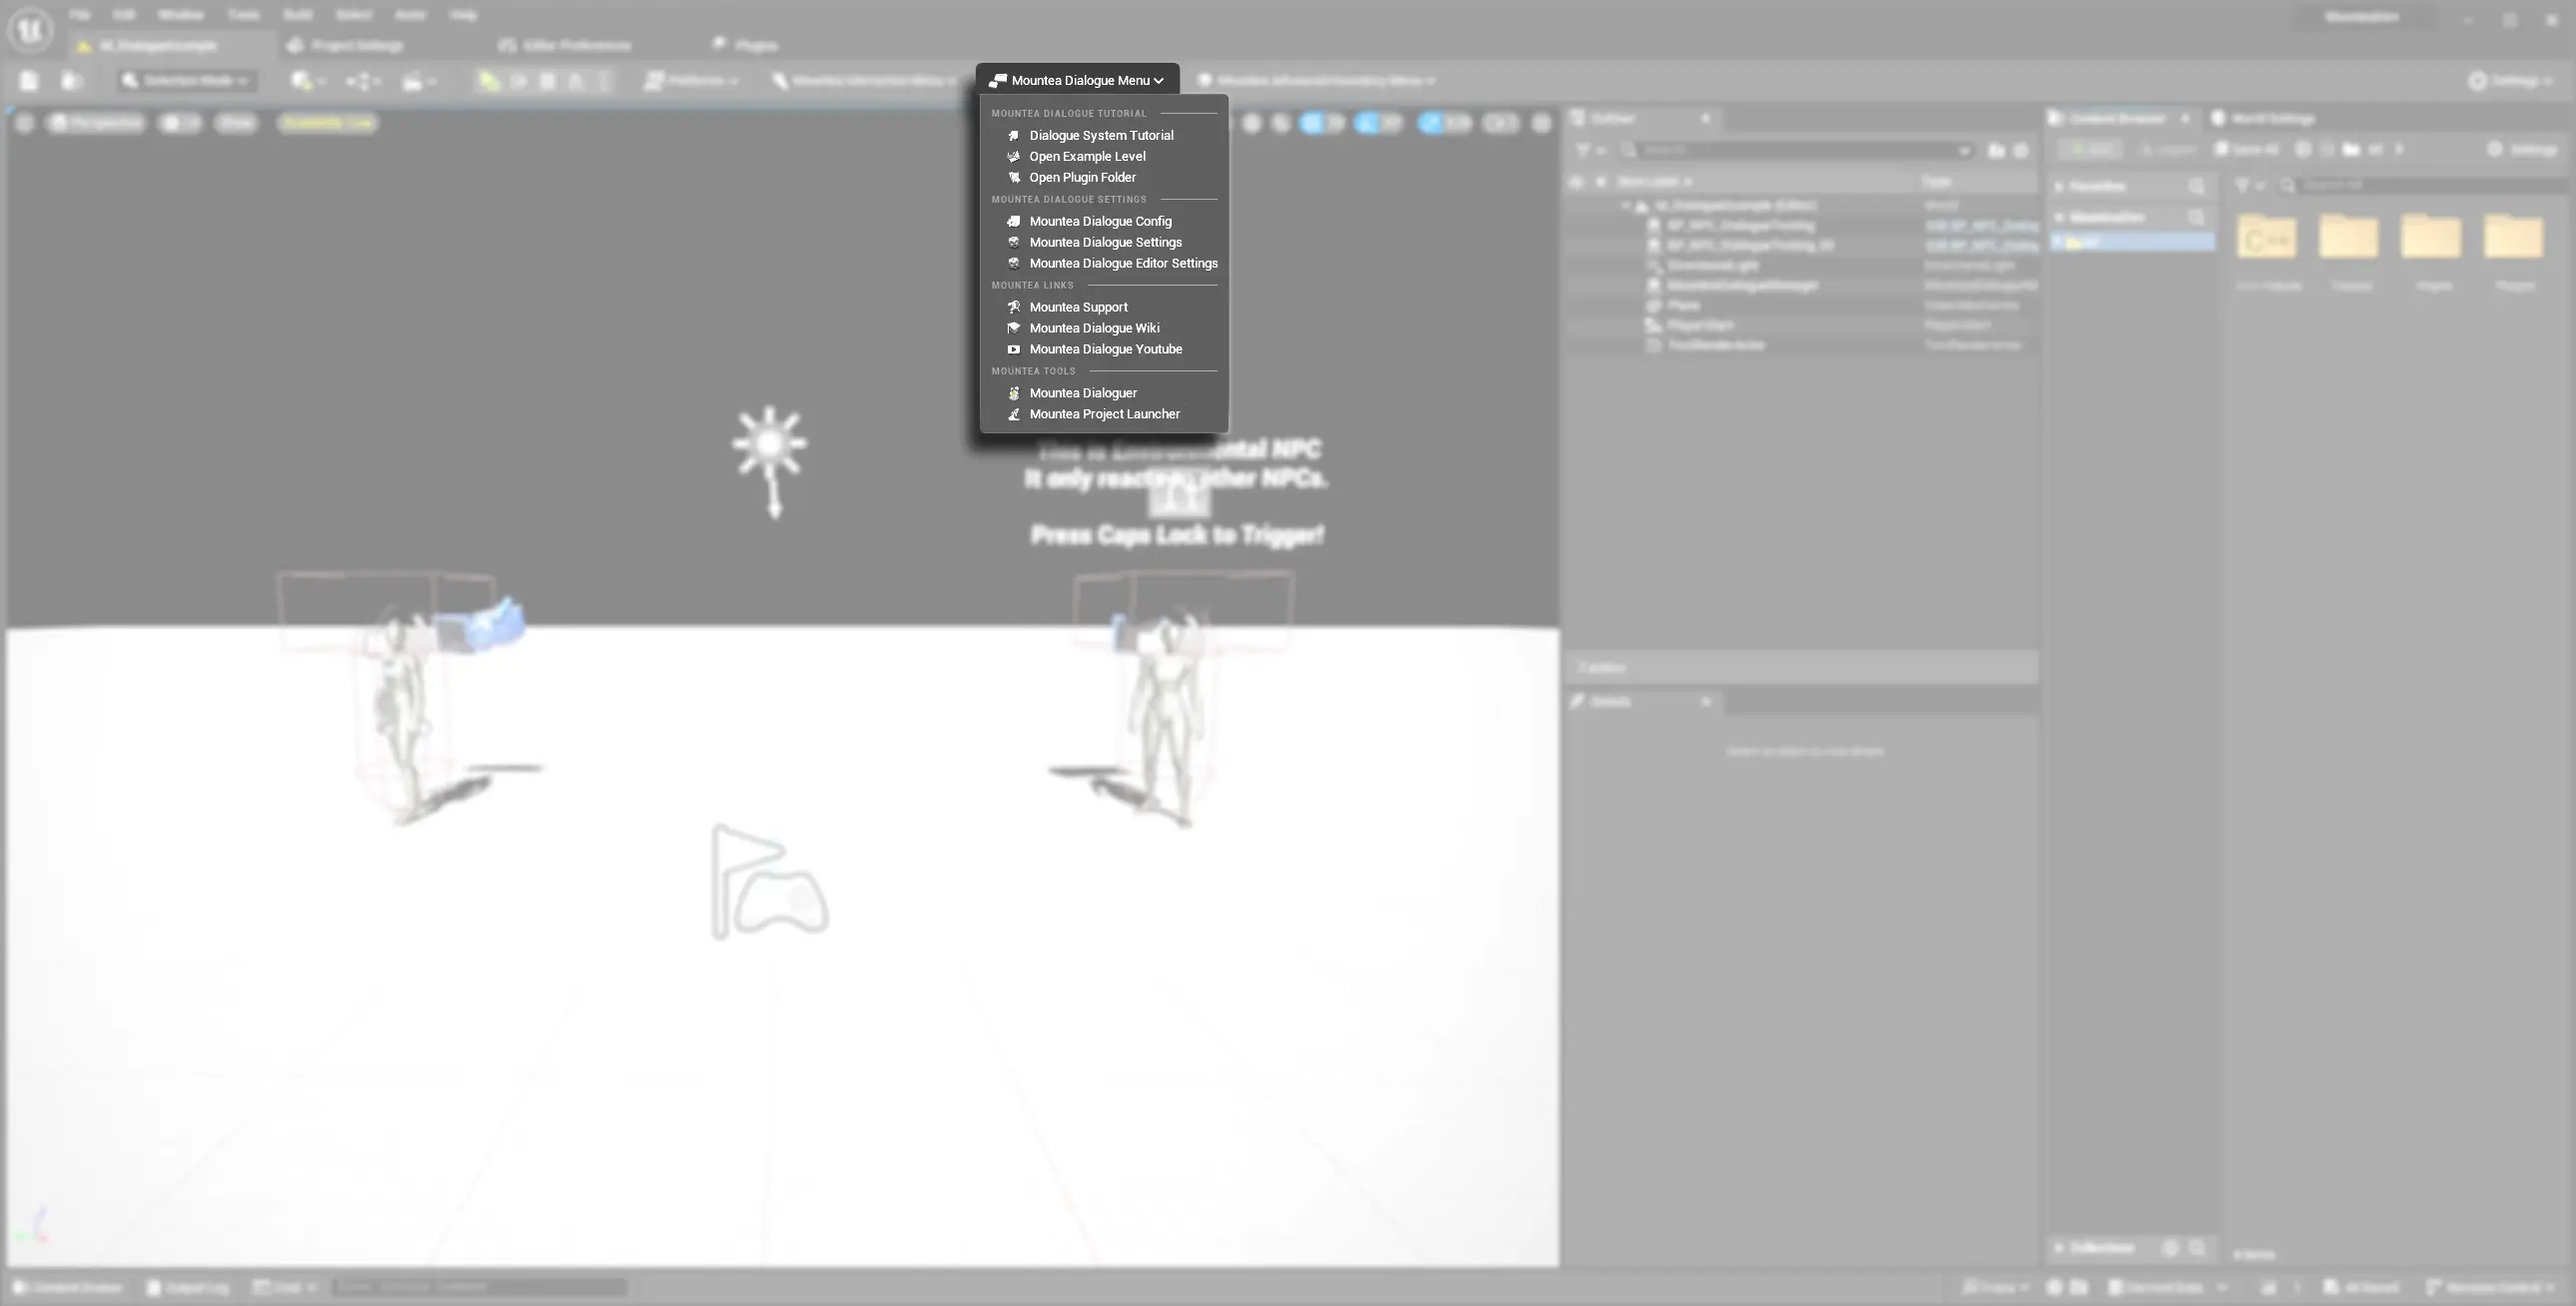
In order to simplify the process of setting up the system, we are providing in-engine tutorial which serves a purpose of quick tutorial. You can open the tutorial panel using the Mountea Dialogue Menu toolbar menu. This Tutorial page also has the ability to navigate you to specific parts, for example: Project Settings, Plugin Folder or specific Config folder.
This Tutorial page should provide just enough information to kickstart your project.
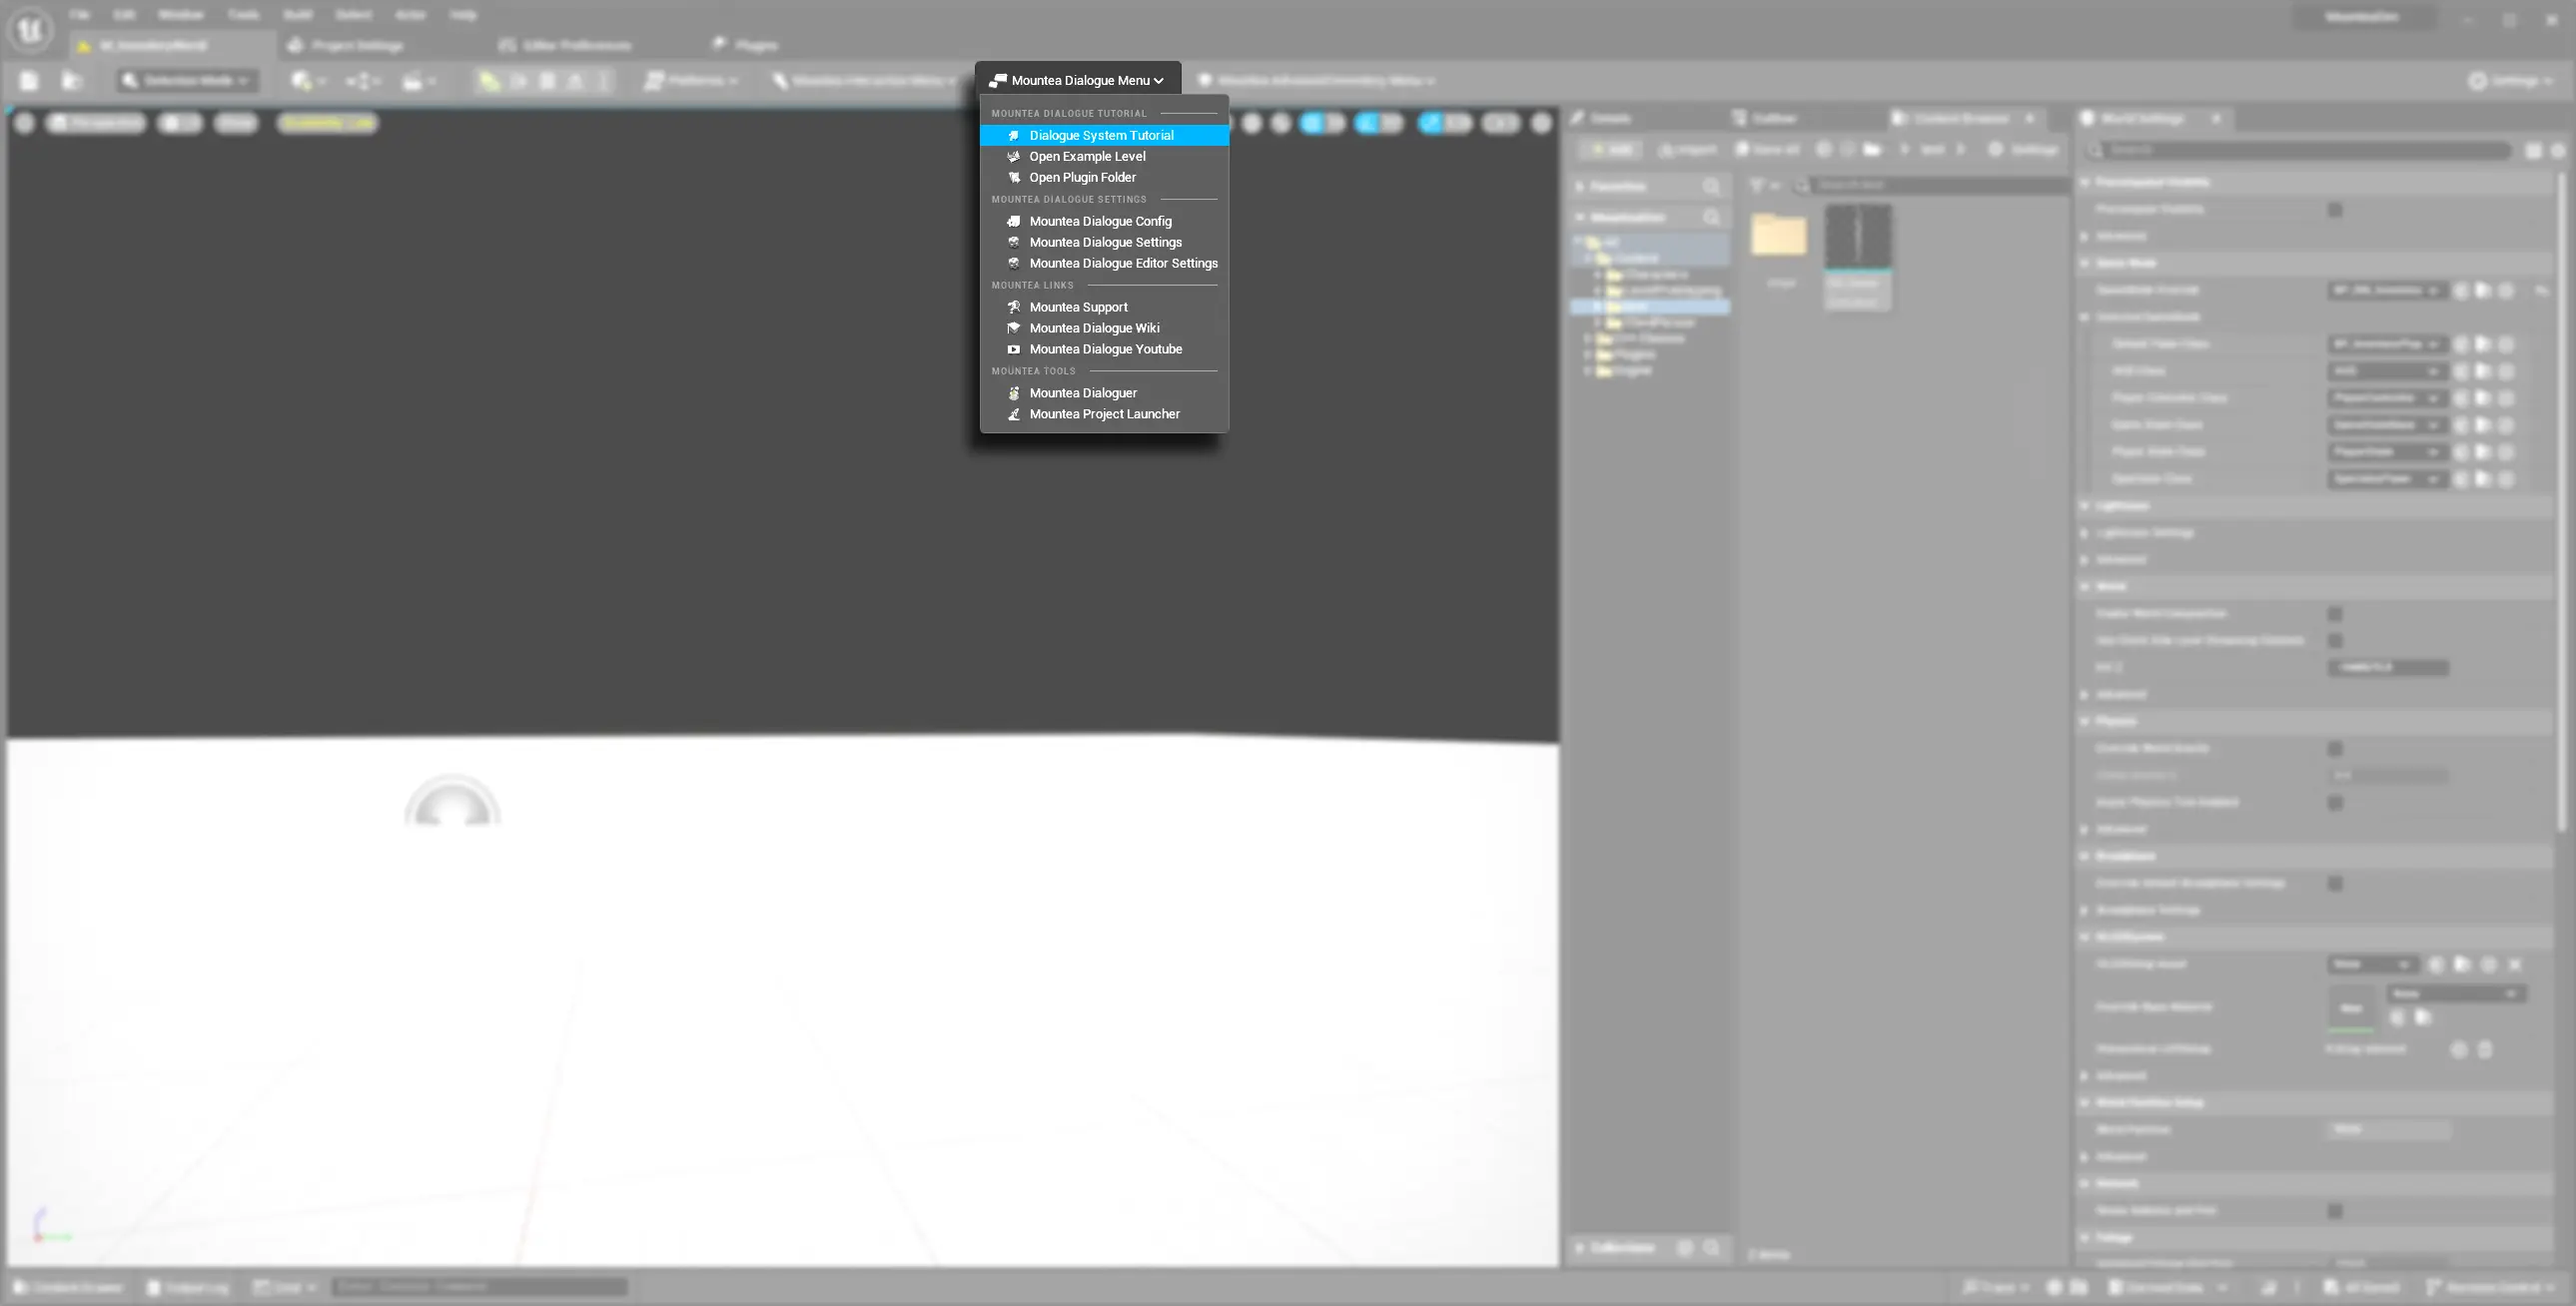
Quick Tip
You can dock the Tutorial window so it never goes away.
2. Open the Configuration Window
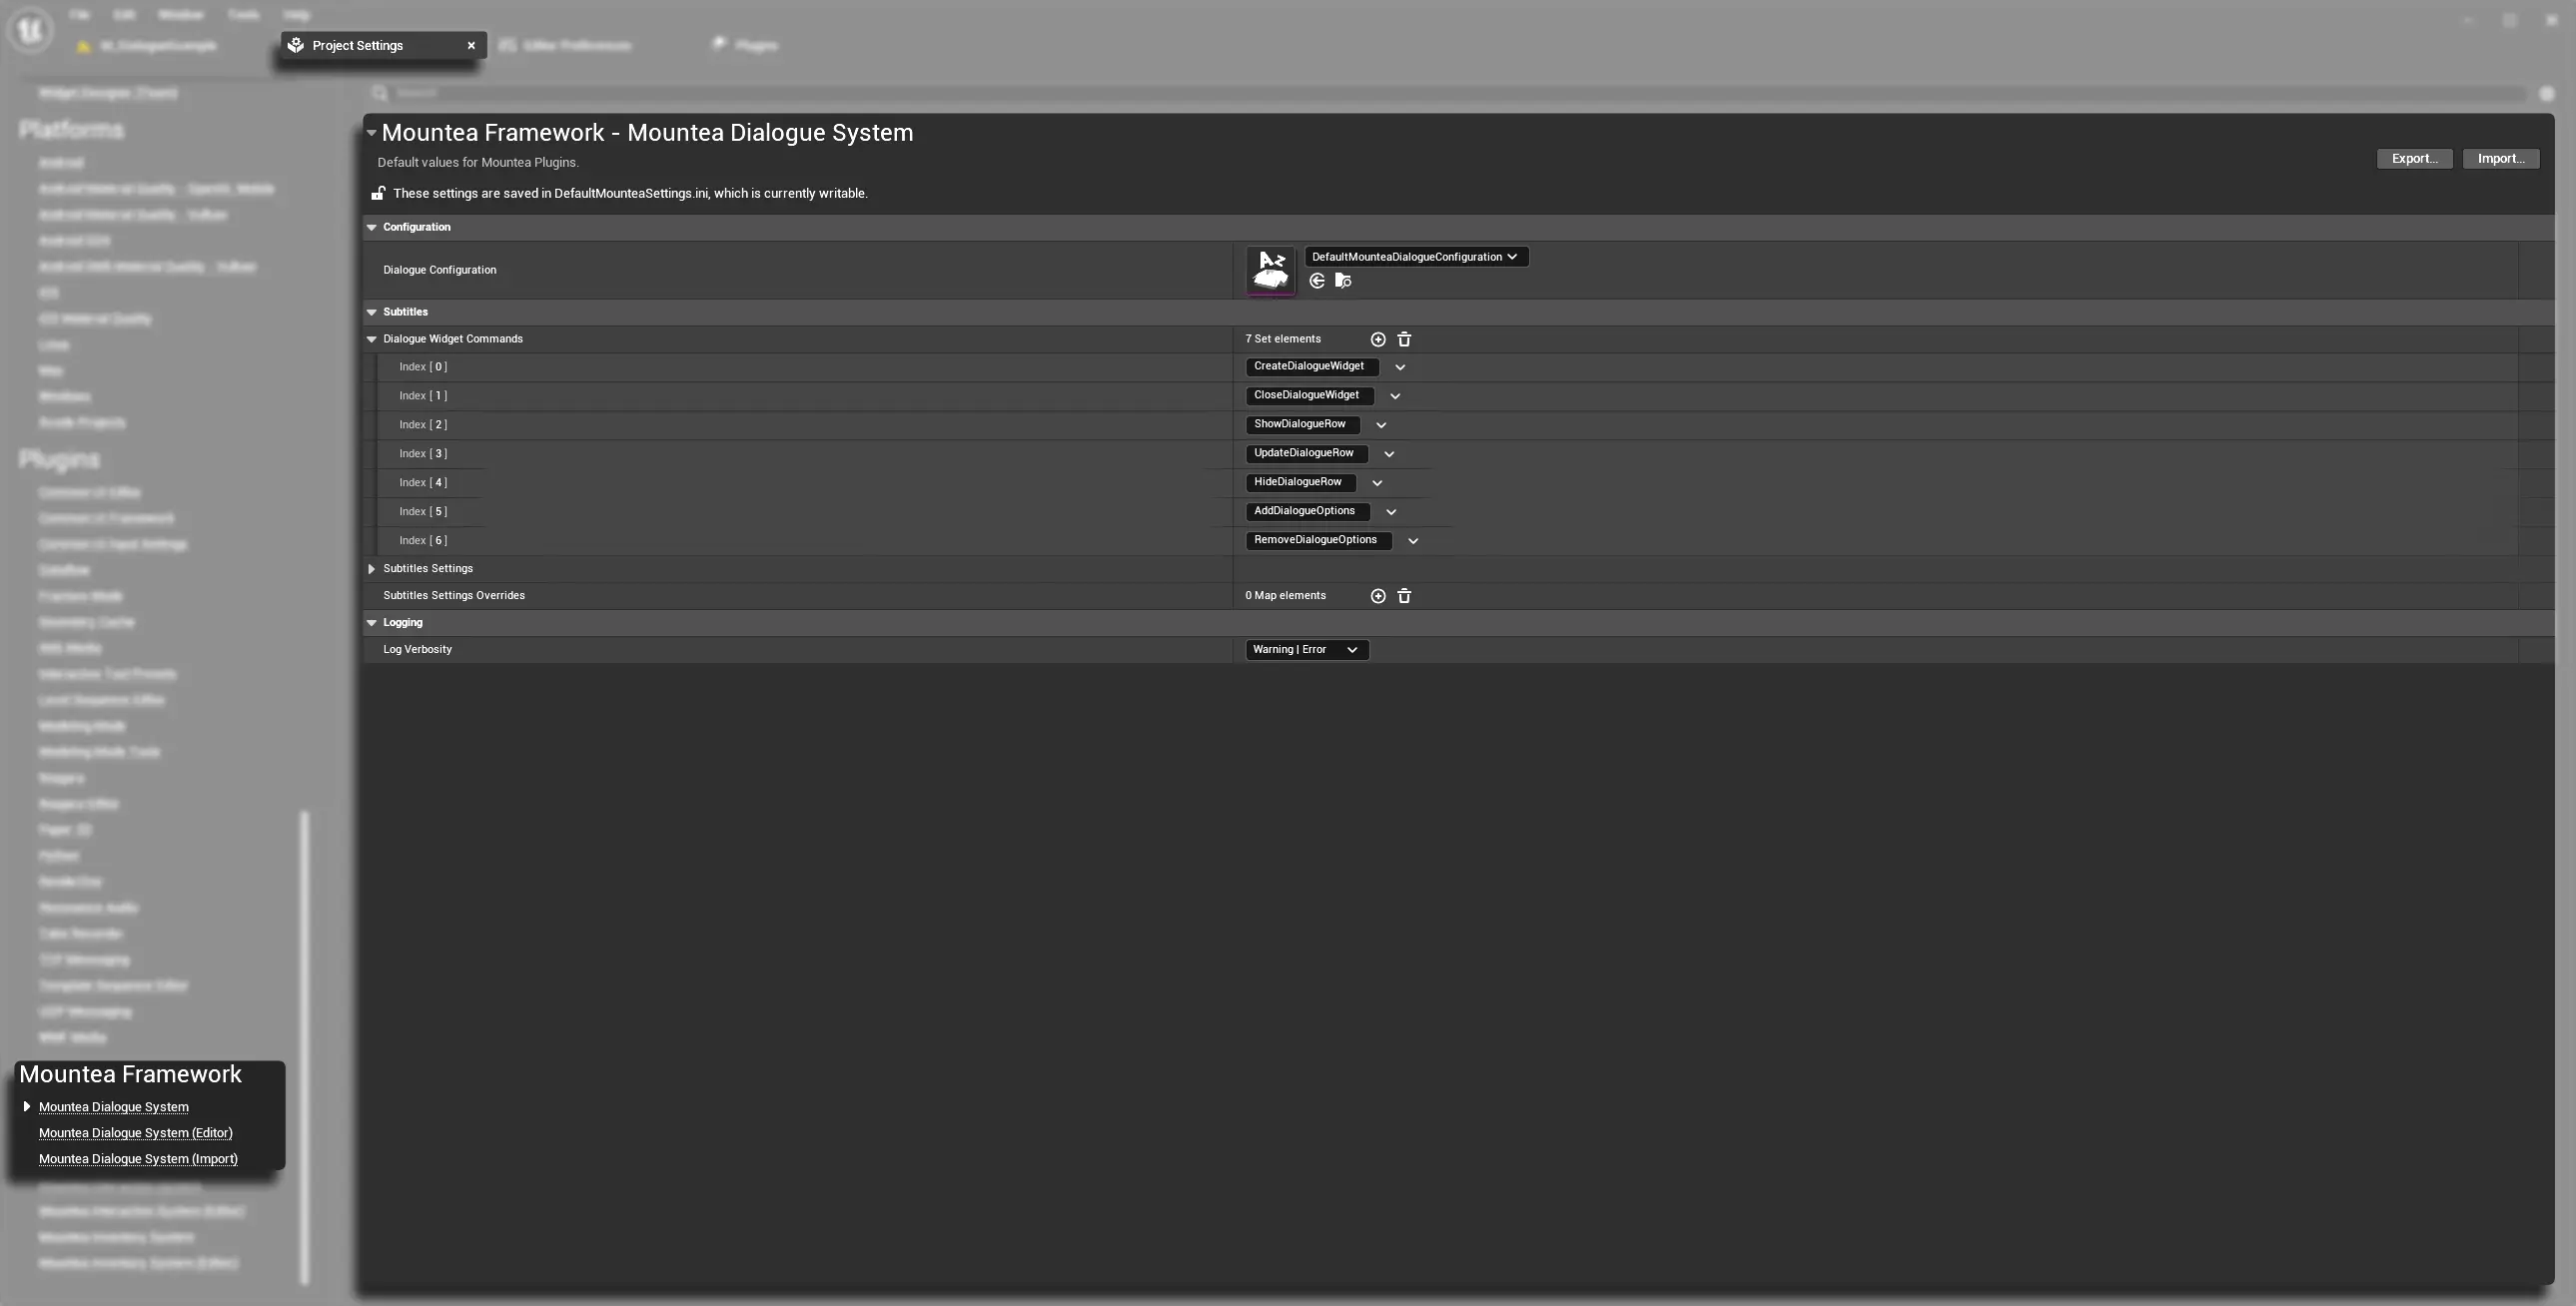
In order to start configuration of the Dialogue System first you need to open the Configuration window which contains all possible settings.
- In the Unreal Editor, go to Edit → Project Settings.
- Scroll down and expand Mountea Framework in the sidebar.
- Click Mountea Dialogue System to reveal game‑time and editor‑only settings.
Quick Tip
You can use a toolbar menu Mountea Dialogue System to access Settings and Configuration.
Default Values
Dialogue System comes with default Configuration asset which can be used as inspiration for your game—or even use that one directly.
3. Dialogue Defaults (Runtime)
These settings define how every conversation behaves in your game. Once set, every Dialogue Manager component uses these values automatically. In newer version of the system (since version 2.x) the runtime settings are replaced with Dialogue Configuration asset which contains all the runtime configuration properties.

Runtime settings now provide 3 main categories:
- Configuration: Contains Config Asset reference which contains the actual settings
- Subtitles: A list of widget commands used for class-independent communication across the Dialogue System as well as (deprecated) subtitles settings.
- Logging: Provides a way to allow certain verbosity of logs
Subtitles Settings
Subttitles settings are visible both in the Project Settings as well in the Configuration. Please, use the Configuration ones!
3.1 Dialogue Configuration
Dialogue Configuration is separated editor asset which can be created and setup to fit your project needs. This config asset serves purpose of keeping default values driving the Dialogue system.
| Property | Description | Default |
|---|---|---|
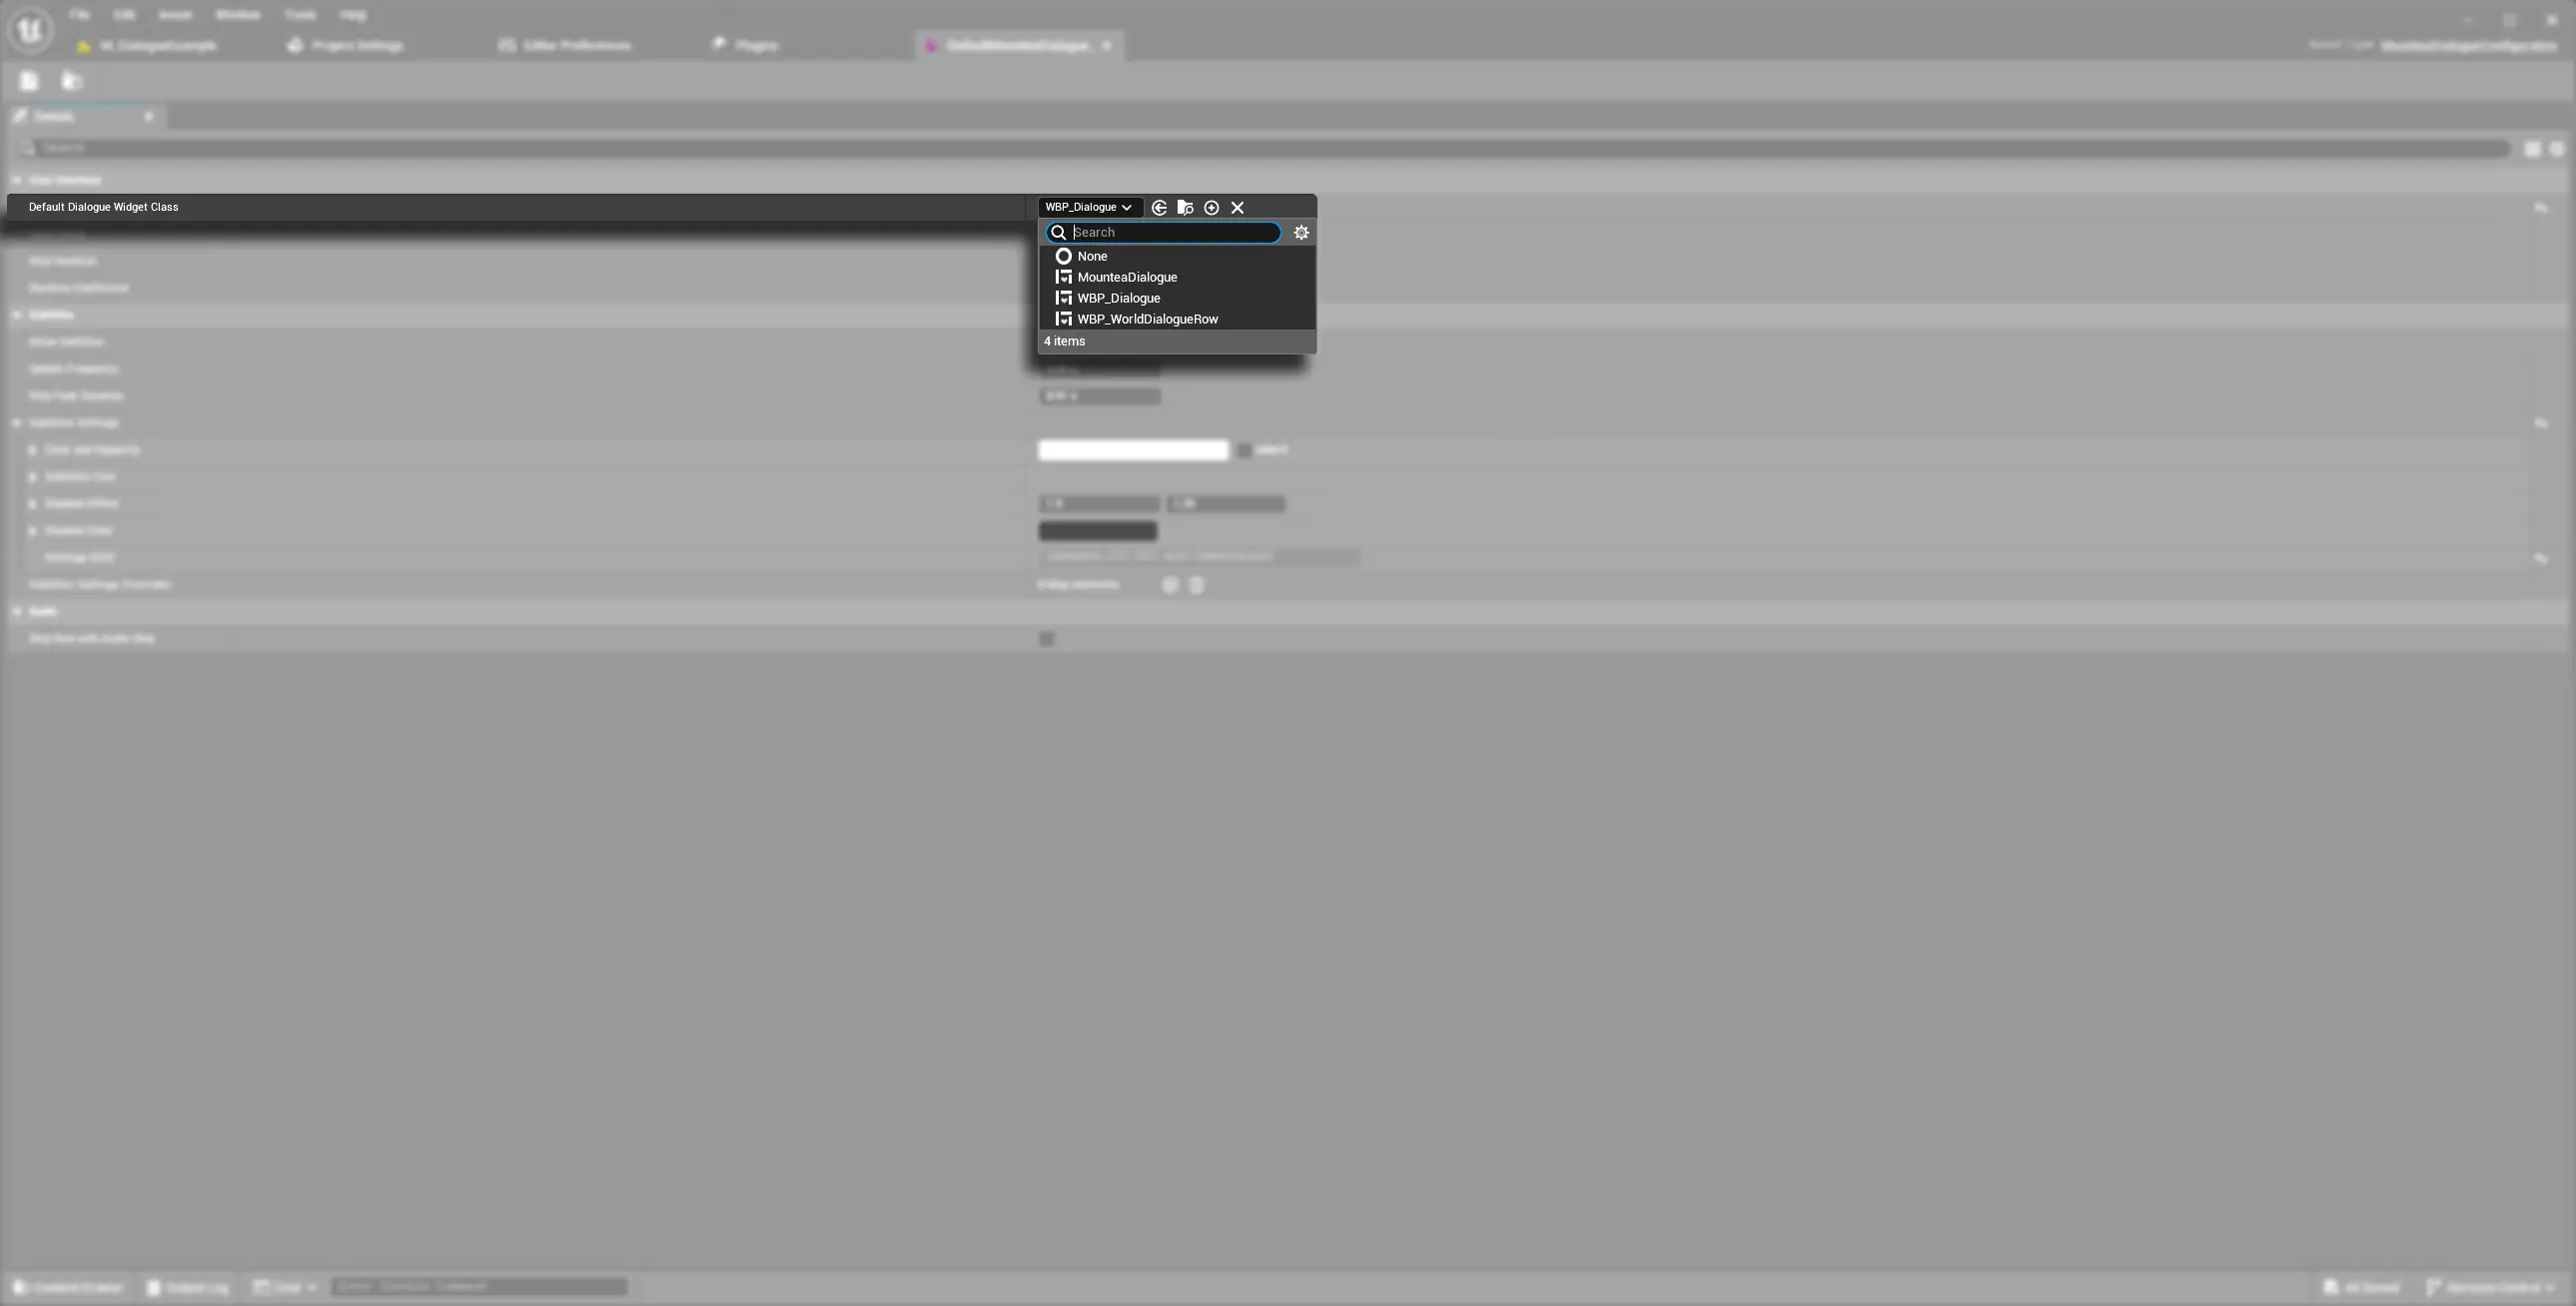
| Default Dialogue Widget Class | Select the Blueprint or C++ widget that renders your conversations. Your widget must implement IMounteaDialogueWBPInterface to appear in this list. |
nullptr |
| Input Mode |
|
Game and UI |
| Skip Duration | Control how long the Skip is required to be used in order to skip the current dialogue node. | 1.0s |
| Duration Coefficient | Defines coefficient of speed per 100 characters for Automatic value from RowDurationMode. |
8.0s |
| Allow Subtitles | Defines whether subtitles are allowed or not. If subtitles are not allowed, C++ requests won't request showing subtitles. | true |
| Update Frequency | Defines how often Dialogue Widgets update per second. Is used for Tick timers. Lower the value higher the performance impact. | 0.05s |
| Skip Fade Animations | Defines fading duration to naturally stop voice when anything is playing. | 0.01s |
| Skip Row With Audio Skip | Defines whether whole Dialogue Row is skipped when audio skip is requested. This setting defines behaviour for all Nodes. Each Node allows different behaviour, so in special cases Node inversion can be used. | 0.01s |
| Subtitles Settings | List of General Dialogue Settings. Defines font, sizes etc. for all subtitles. If any Widget is supposed to be overriden and use different setup for subtitles, just add that override to 'SubtitlesSettingsOverrides'. | 0.01s |
| Subtitles Settings Overrides | Map of Widget Classes and their Subtitles Settings. Used for overriding General Defaults. | 0.01s |
Define Base Widget Class
If you leave this blank, you’ll need to assign a widget on every Dialogue Manager actor instead.
Row-Level Styling
Give each dialogue row (ID 0–255) its own font, color, or effect. Perfect for highlighting narrator lines, special characters, or tutorial hints without creating new widgets.
4. Styling Your Dialogue
Make every line look on‑brand without touching widget Blueprints. That is what Subtitles Settings is for, a place to define text visuals and behaviour.
- Text Color & Opacity: Match your UI theme and legibility requirements.
- Font Family & Size: Pick a readable font that fits your art style.
- Shadow & Outline: Improve contrast on busy backgrounds or add a stylistic flair.
Design Consistency
Keep your dialogue style consistent with HUD and menus for a cohesive experience.
Override Styling
Subttitles Settings are defaulted to be used by all text in the system. However, you can use Subtitles Settings Overrides to specify text to a specific options, eg. Closing Dialogue or Main Quest options.
5. Dialogue Widget Commands
Commands are simple text keys that tell the system which UI actions to run. You won’t need to touch Blueprint wiring inside the plugin itself.
Those Commands are replacing class-based events, allowing the system to be purely interfaced and abstracted. The main advantage of this approach is flexibility-you can define your own Dialogue UI without even using the default ones!
5.1 Core Commands (Fixed)
These commands are provided by the plugin’s C++ core. They trigger standard UI behavior and should never be renamed or removed:
| Command | What It Does |
|---|---|
CreateDialogueWidget |
Creates the dialogue window. |
ShowDialogueRow |
Displays a new line of dialogue. |
UpdateDialogueRow |
Edits the current dialogue line. |
AddDialogueOptions |
Shows player choice buttons. |
RemoveDialogueOptions |
Clears old choice buttons. |
HideDialogueRow |
Fades out the current line. |
CloseDialogueWidget |
Closes the dialogue window. |
Core Commands
These are baked into the plugin’s code. Changing them breaks core functionality.
5.2 Custom Commands
You can also fire your own commands from dialogue data to hook into game logic. Just list the command name in the list.
Examples:
PlayCameraShake
ShowCharacterPortrait
SwitchCamera
Your game’s code listens for these strings. Now it is up you to run matching events or functions.
6. Best Practices
- Start with Defaults: Use the out‑of‑the‑box settings and only tweak as needed.
- Work Incrementally: Change one setting at a time and test in‑editor or in‑game immediately.
- Document Custom Commands: Keep a shared list of custom command names and their handlers.
- Version Control: Commit your
DefaultGame.iniandDefaultEditor.iniso team members stay in sync.